The golden pig
Over the winter of 2021, I had a chance to make a bike frame and learn to weld at the same time. Here’s how it went.
The bike
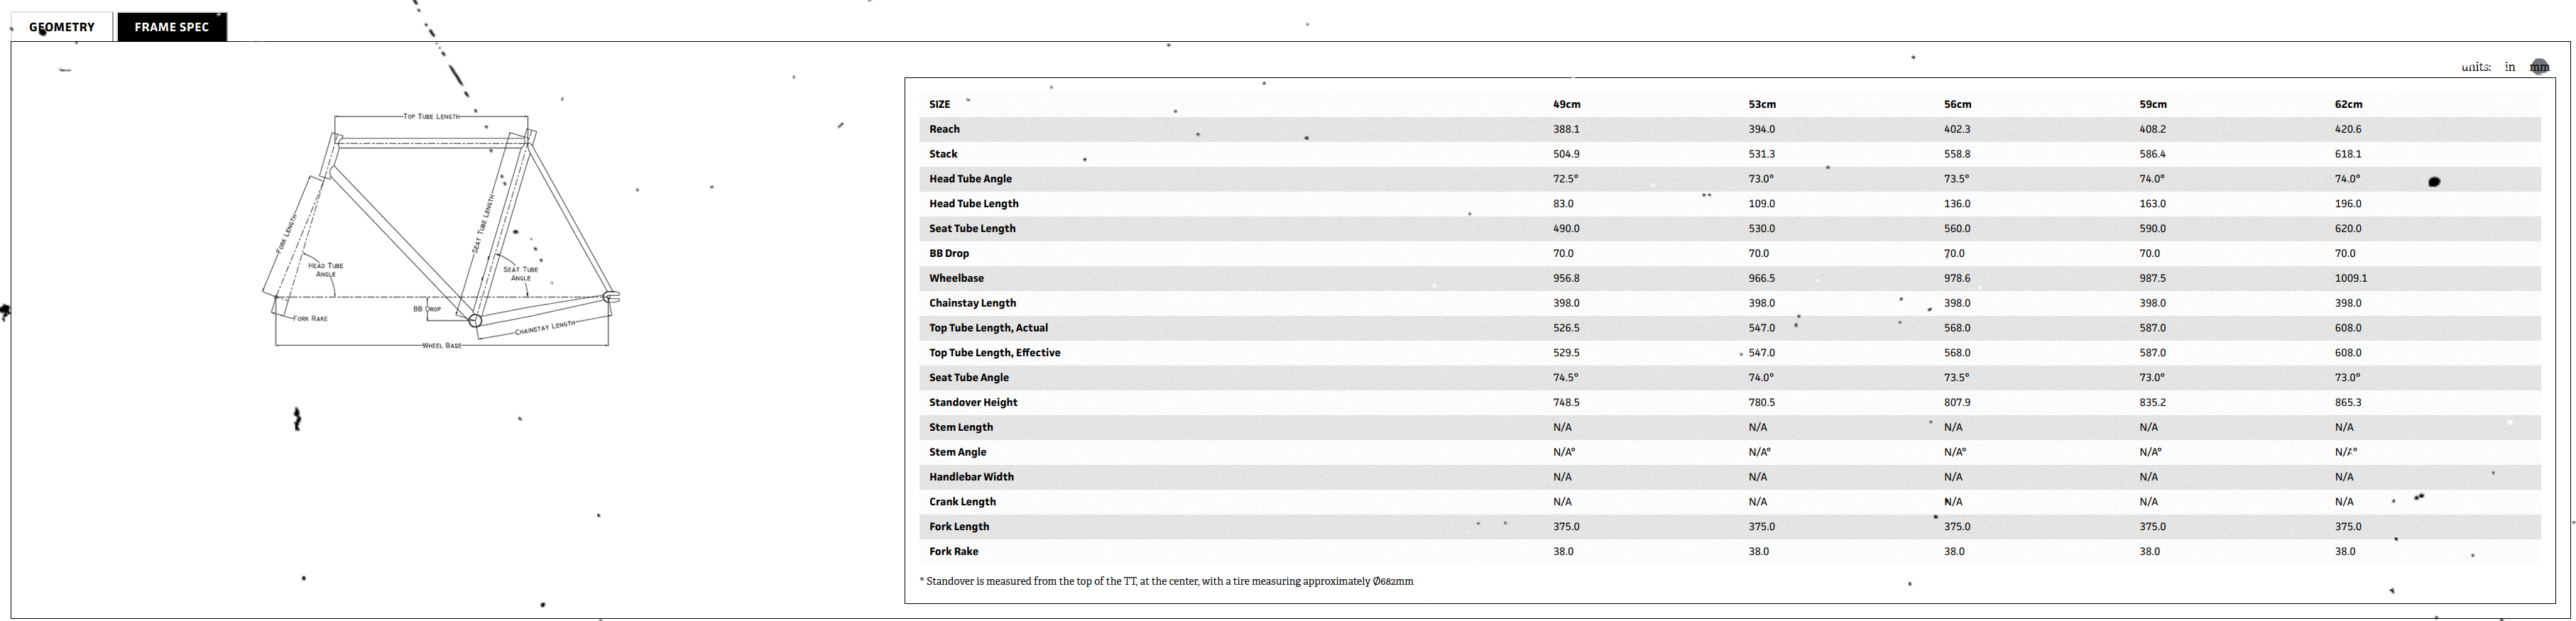
The bike was going to be made of mild steel. ___ inch thick __ inch diameter __ steel tubing to be exact. I had always wanted to make a bike (and learn to weld), and luckily Jack Whipple was running a bike building course at the D-Lab and was kind enough to let me in. Jack cut the tubes on a four axis fablight laser and provided everything necessary to turn them into a bike, including tons of patience. Without him, there would be no bike. He also got a frame jig which turned out to be essential in making something bike-shaped and symmetrical, but more on that later. The design was based on the Surly Steamroller (Surly has frame dimensions and drawings on their website).
The basics
The first essential piece of the bike building puzzle that I was lacking was the ability to MIG weld. Jonhenry and Jack were kind enough to teach me how to do that, although I am still very much a beginner and the spaghetti welds on this bike frame is evidence of that fact. I started with a number of short pieces of practice tubing which I mangled badly. Eventually, after I learned how to stop blasting holes through the metal, it was time to attempt the real thing.
As it turns out, tacking the frame together was easy. Tacking with the MIG welder is like using extremely hot glue.
PICTURE OF TACKED FRAME
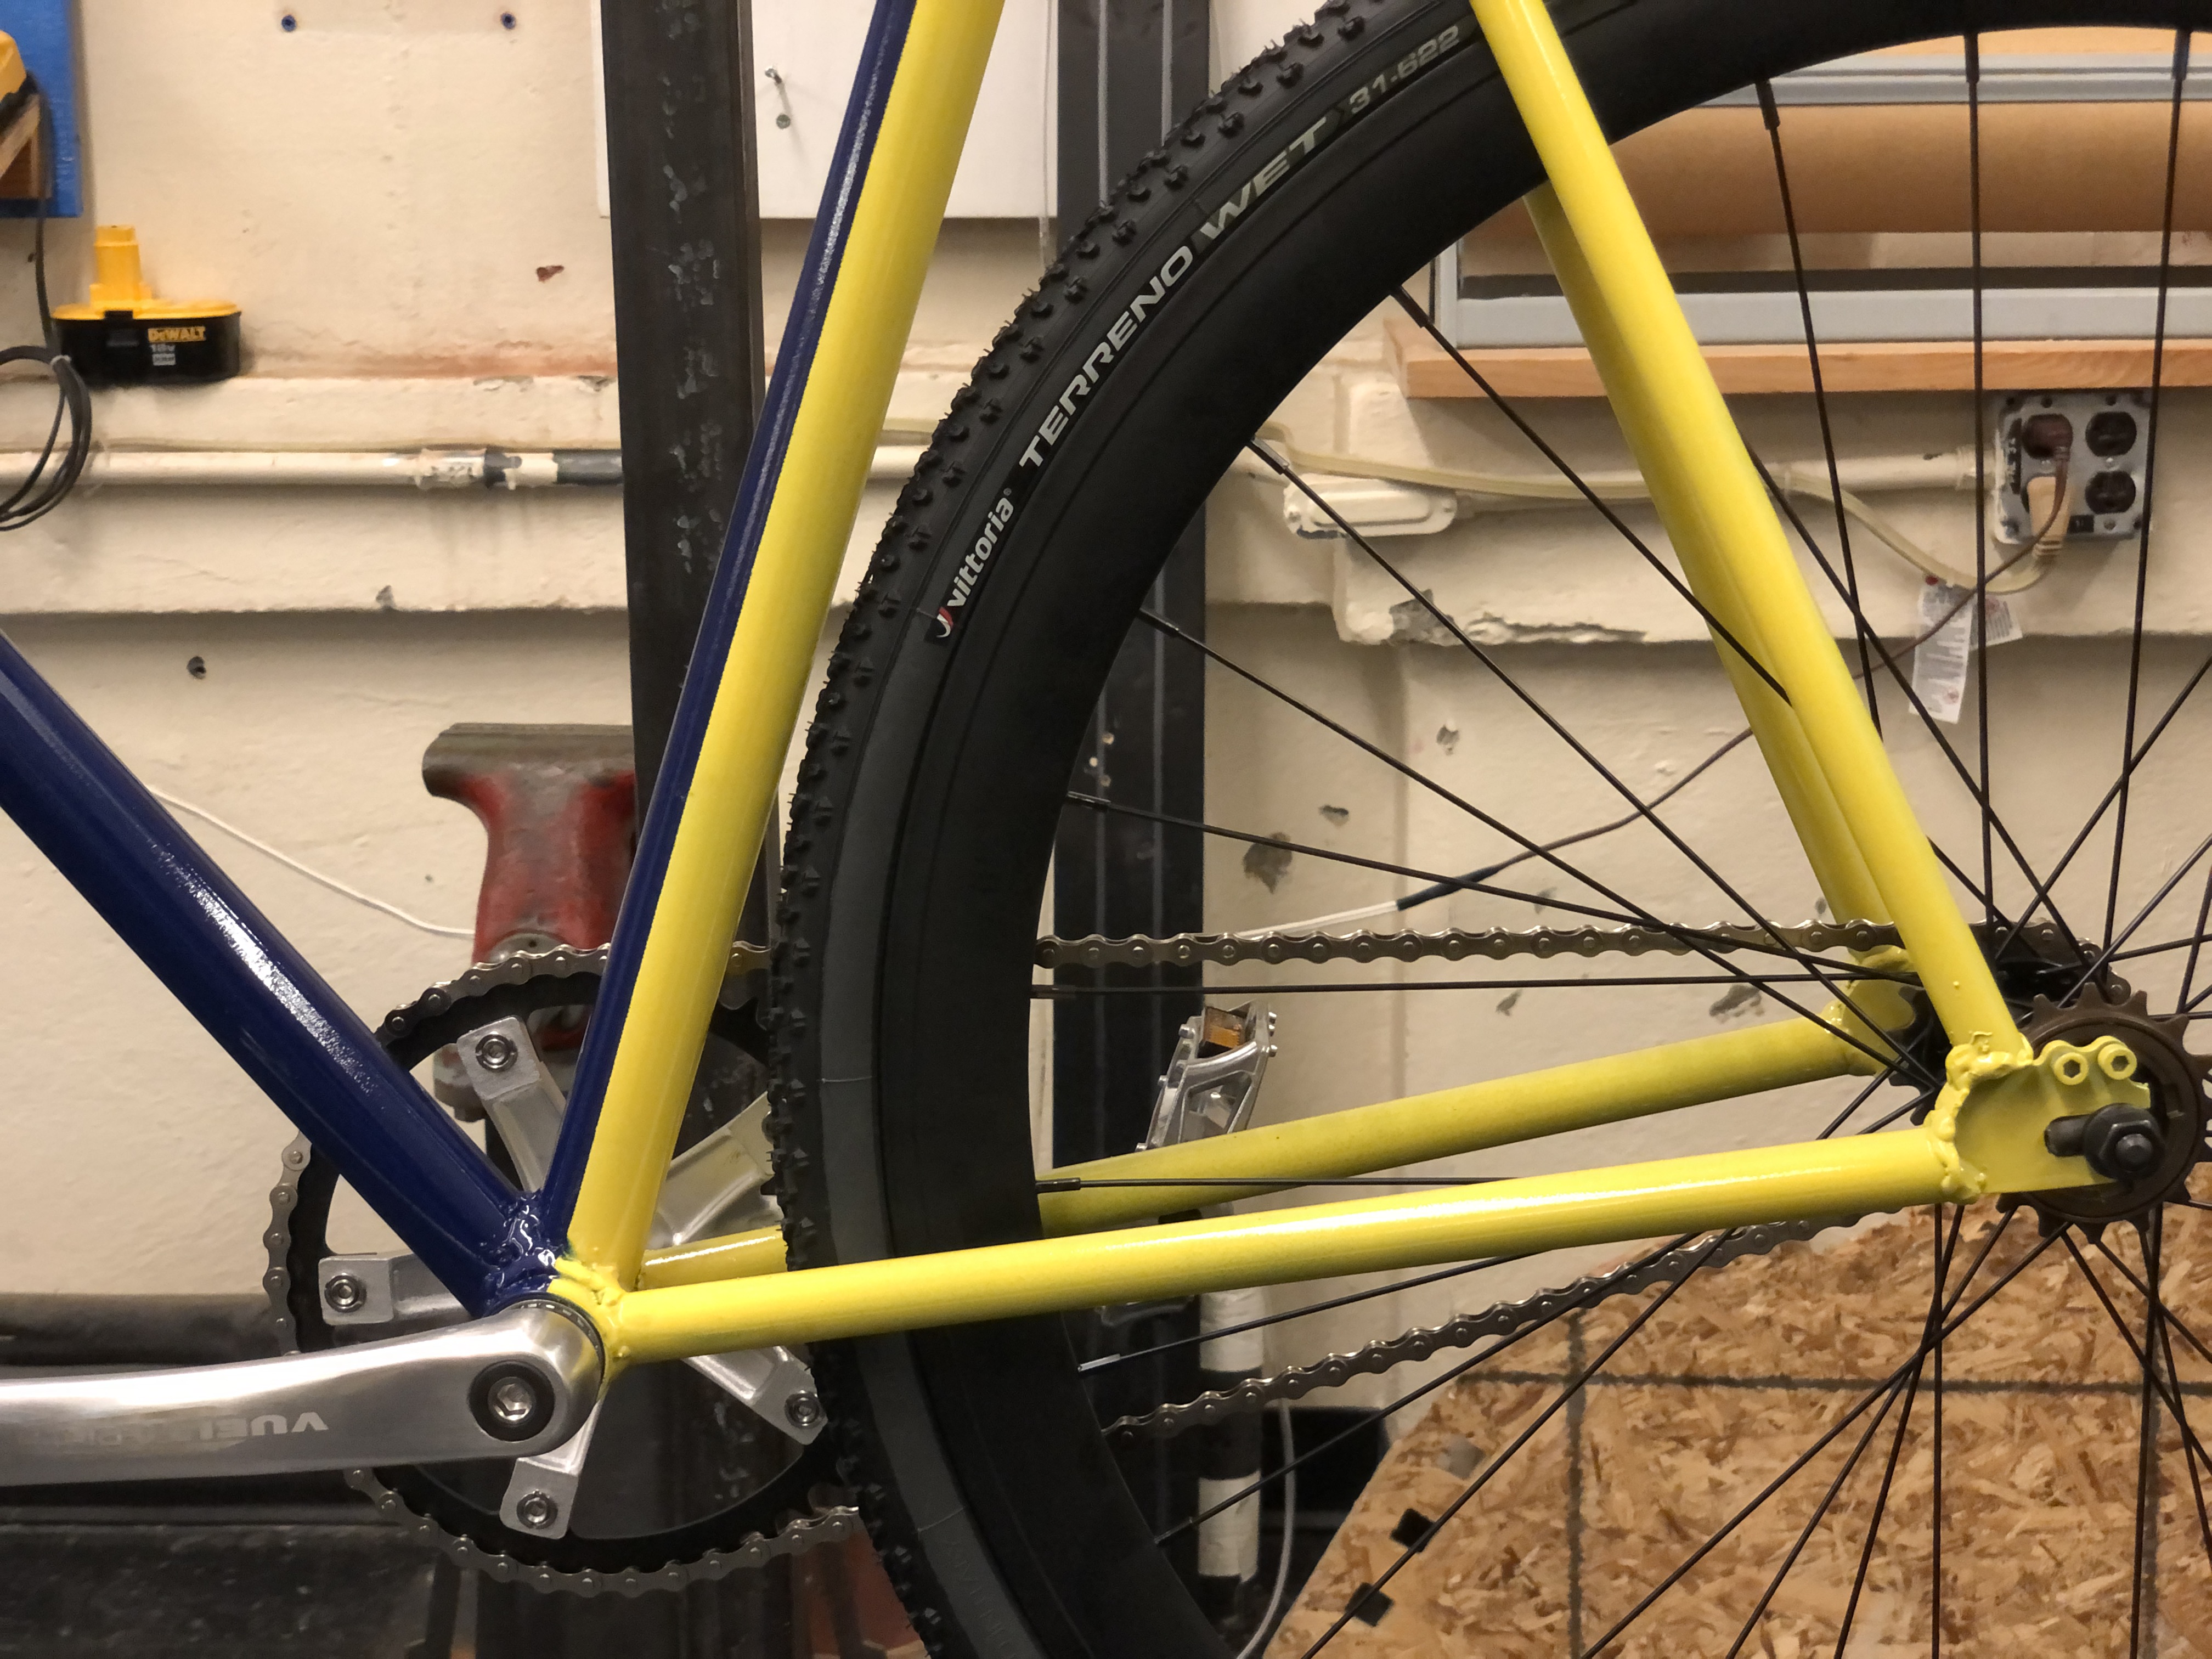
One of the unexpectedly convenient aspects of tacking the frame together was the ability to push and pull on the frame once tacked until it was straight and true. This could be accomplished by putting a long 2x4 through the main triangle of the frame and pulling hard until the frame was straight. Straightness was measured with an angle gauge. Even if one tack weld broke, the other three on each joint generally held true, making this a remarkably flexible method of putting together a frame. The bike I ride a lot is a Giant gravel bike and I enjoy riding around with large tires on a road-style bike so I made sure to position the chainstays quite far apart on the bottom bracket to make sure I had plenty of space for big tires. All of the tubes on this bike were straight, but in the future it would be fun to build a bike with bent stays.
While welding the frame together, I jumped around the frame, trying to avoid putting too much heat into any given area to avoid warping. This did the trick, and my frame was straight enough to avoid the 2x4 treatment. Some parts of the frame were incredibly hard to reach with the MIG gun. None worse than the point where the chainstays come together on the bottom bracket. This is the joint at the bottom of the bike where the pedals go into the bike, and it contains some of the toughest to access areas on the whole frame. The correct way to accomplish this weld would probably be to build up a puddle in a place that is easy to access, and then lead the puddle around the tube into the unreachable zone. Once the weld puddle is established, it is easier to move around and maintain it, rather than starting a puddle in a hard to reach area. This is easier said than done and I’ll just say that I’m glad those welds are on the bottom of the bike and that odds are, you’ll only see the pictures I show you here, so hopefully knowledge of how these welds look will be lost to the winds of time.
Welding the head tube was probably the most nerve wracking part of the process because it was made of thinner walled tubing and therefore would be easier to blow through. On these joints, I tried to keep most of the heat in the thicker walled downtube and top tube. I actually overcompensated and burned away a small amount of the top tube, but was able to fill the hole easily enough. These actually turned out to be some of the more acceptable welds on the frame. This is a happy coincidence because these are the only welds I can see while riding the bike. Sometimes things really work out…
After the welding process was complete, I did a good deal of grinding and hand filing in a more or less futile attempt to hide my shame. The grinding definitely reduced some of the more egregiously lumpy welds, but a moderate size reduction and some general smoothing was the best I could hope for. With that, it was time to put it together and see if it would support a rider.
Putting it together
I had done a good deal of maintenance on bikes in the past but at this point I had never done a whole bike build. Bottom bracket install and headset install were the exciting parts, but none of it was particularly noteworthy. The crank arms are very close to the chainstay, but there’s enough clearance. At this point, the bike supported my weight and could be pedaled around, very exciting. Also at about this time I found around thirty handlebars that the neighboring bike shop was throwing away, we collected those for use on the newly born baby bicycles.
Graphic design is my passion
Next, it was time to paint the frame. From my expert experience, painting can be broken down into two distinct and equally intractable challenges. The first: deciding what to paint. The second: actually painting it.

In an attempt to address the first of these intractable tasks, I made a sketch of the general distribution of colors that I wanted on the frame.
COLORS SKETCH
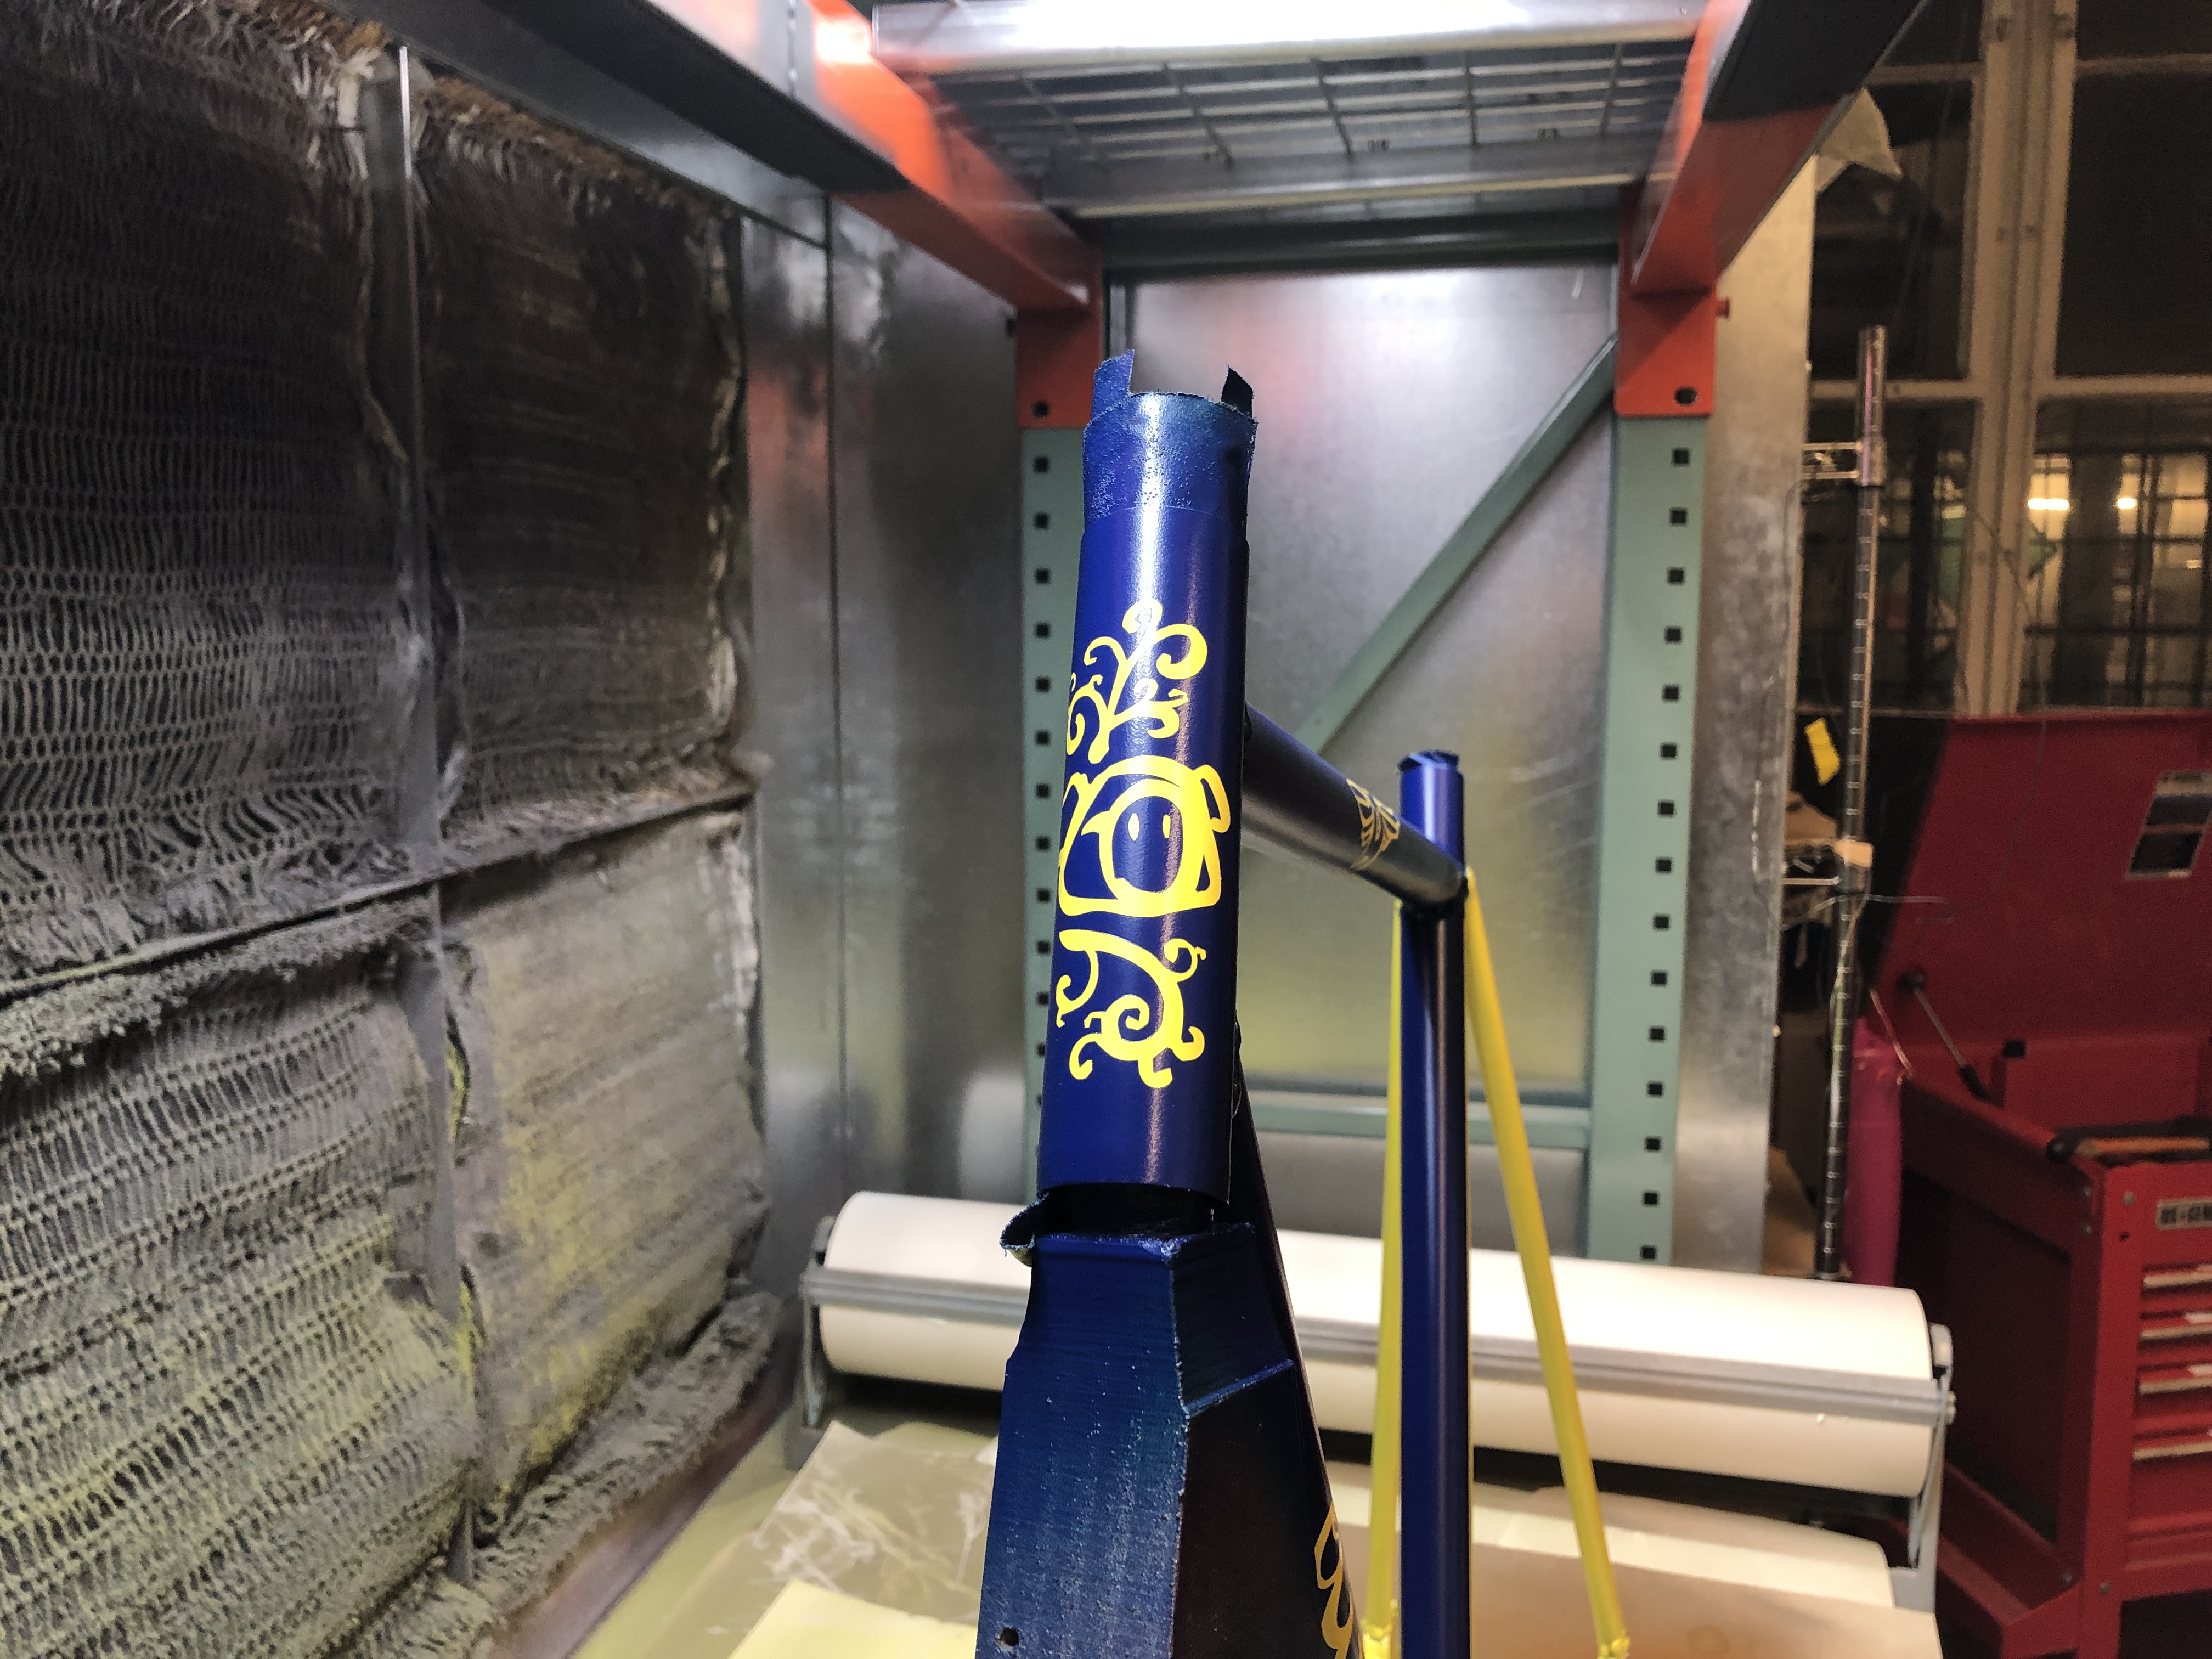
From there, I started designing the decals. I wanted a text logo because that’s what bikes have and I also wanted a little frame head tube badge type thing. My friend Ian came up with a fun Italian-ish name velociacco where velo refers to bicycles and ciacco appears to mean pig or glutton. I drew a bunch of little pigs and text logos and arrived at a few that were kind of silly and nice.
![]()
![]()

The little winged pig vinyl logo looked pretty nice on a water bottle as well.

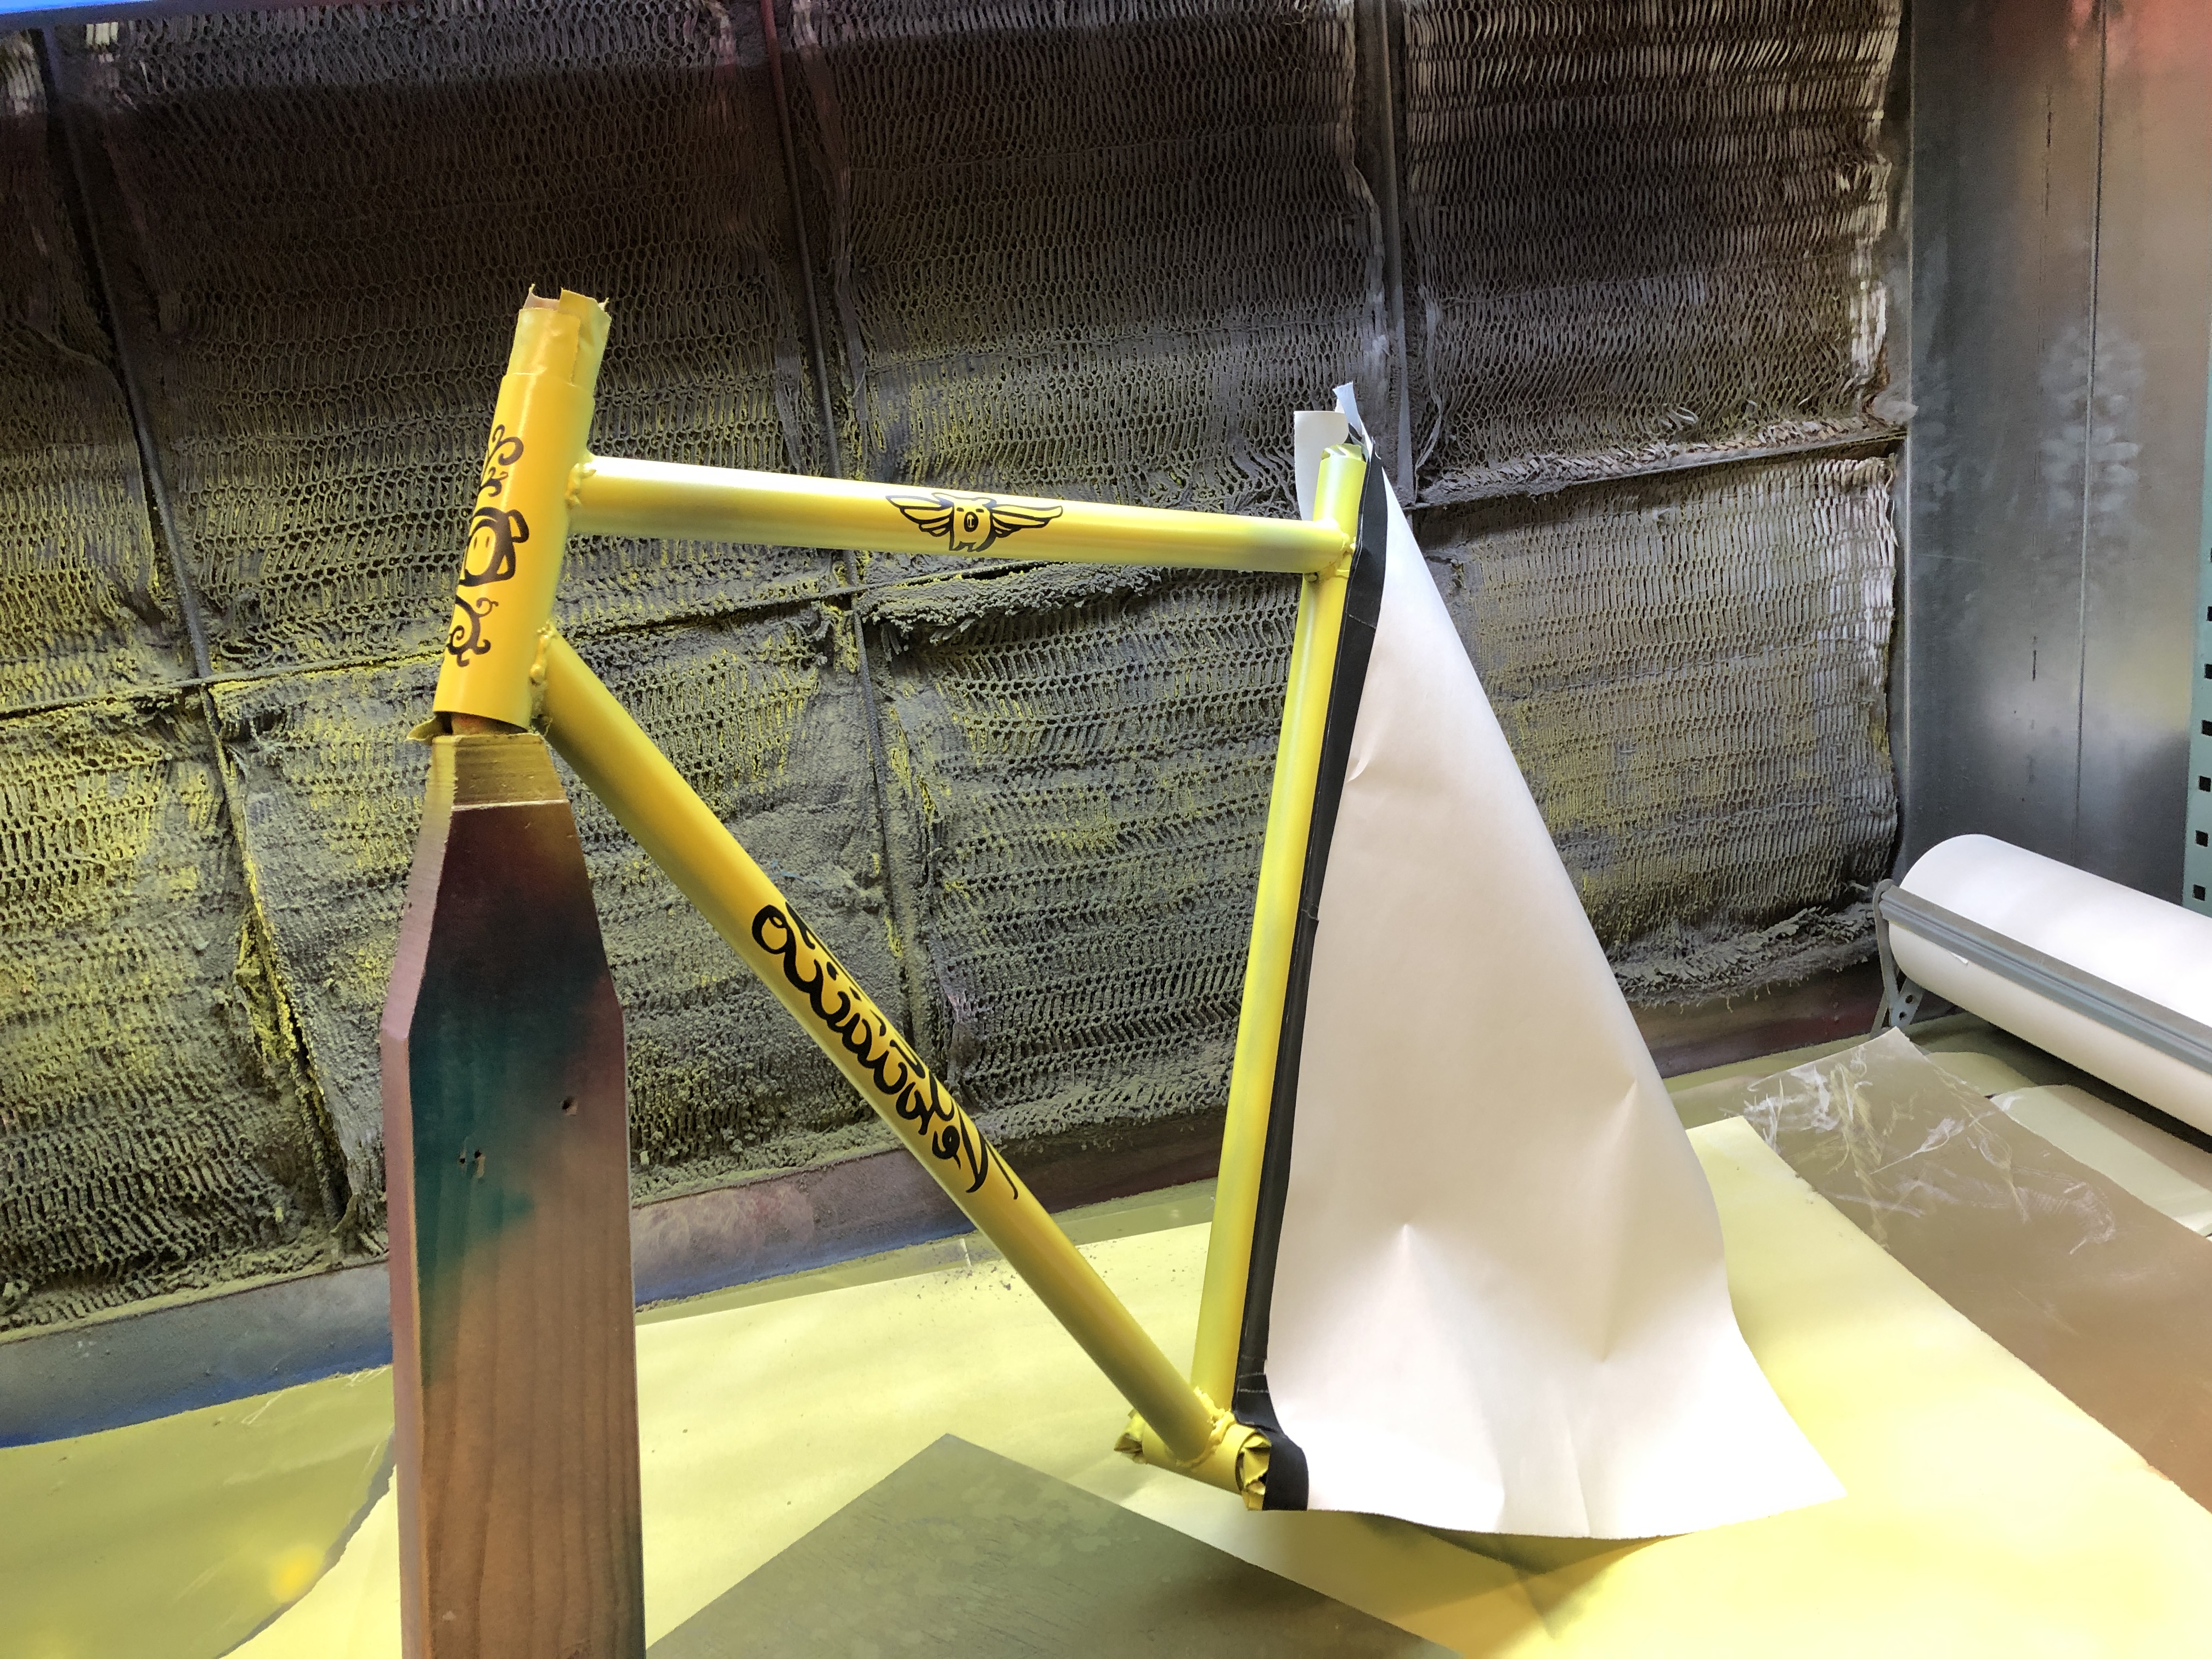
Painting and masking
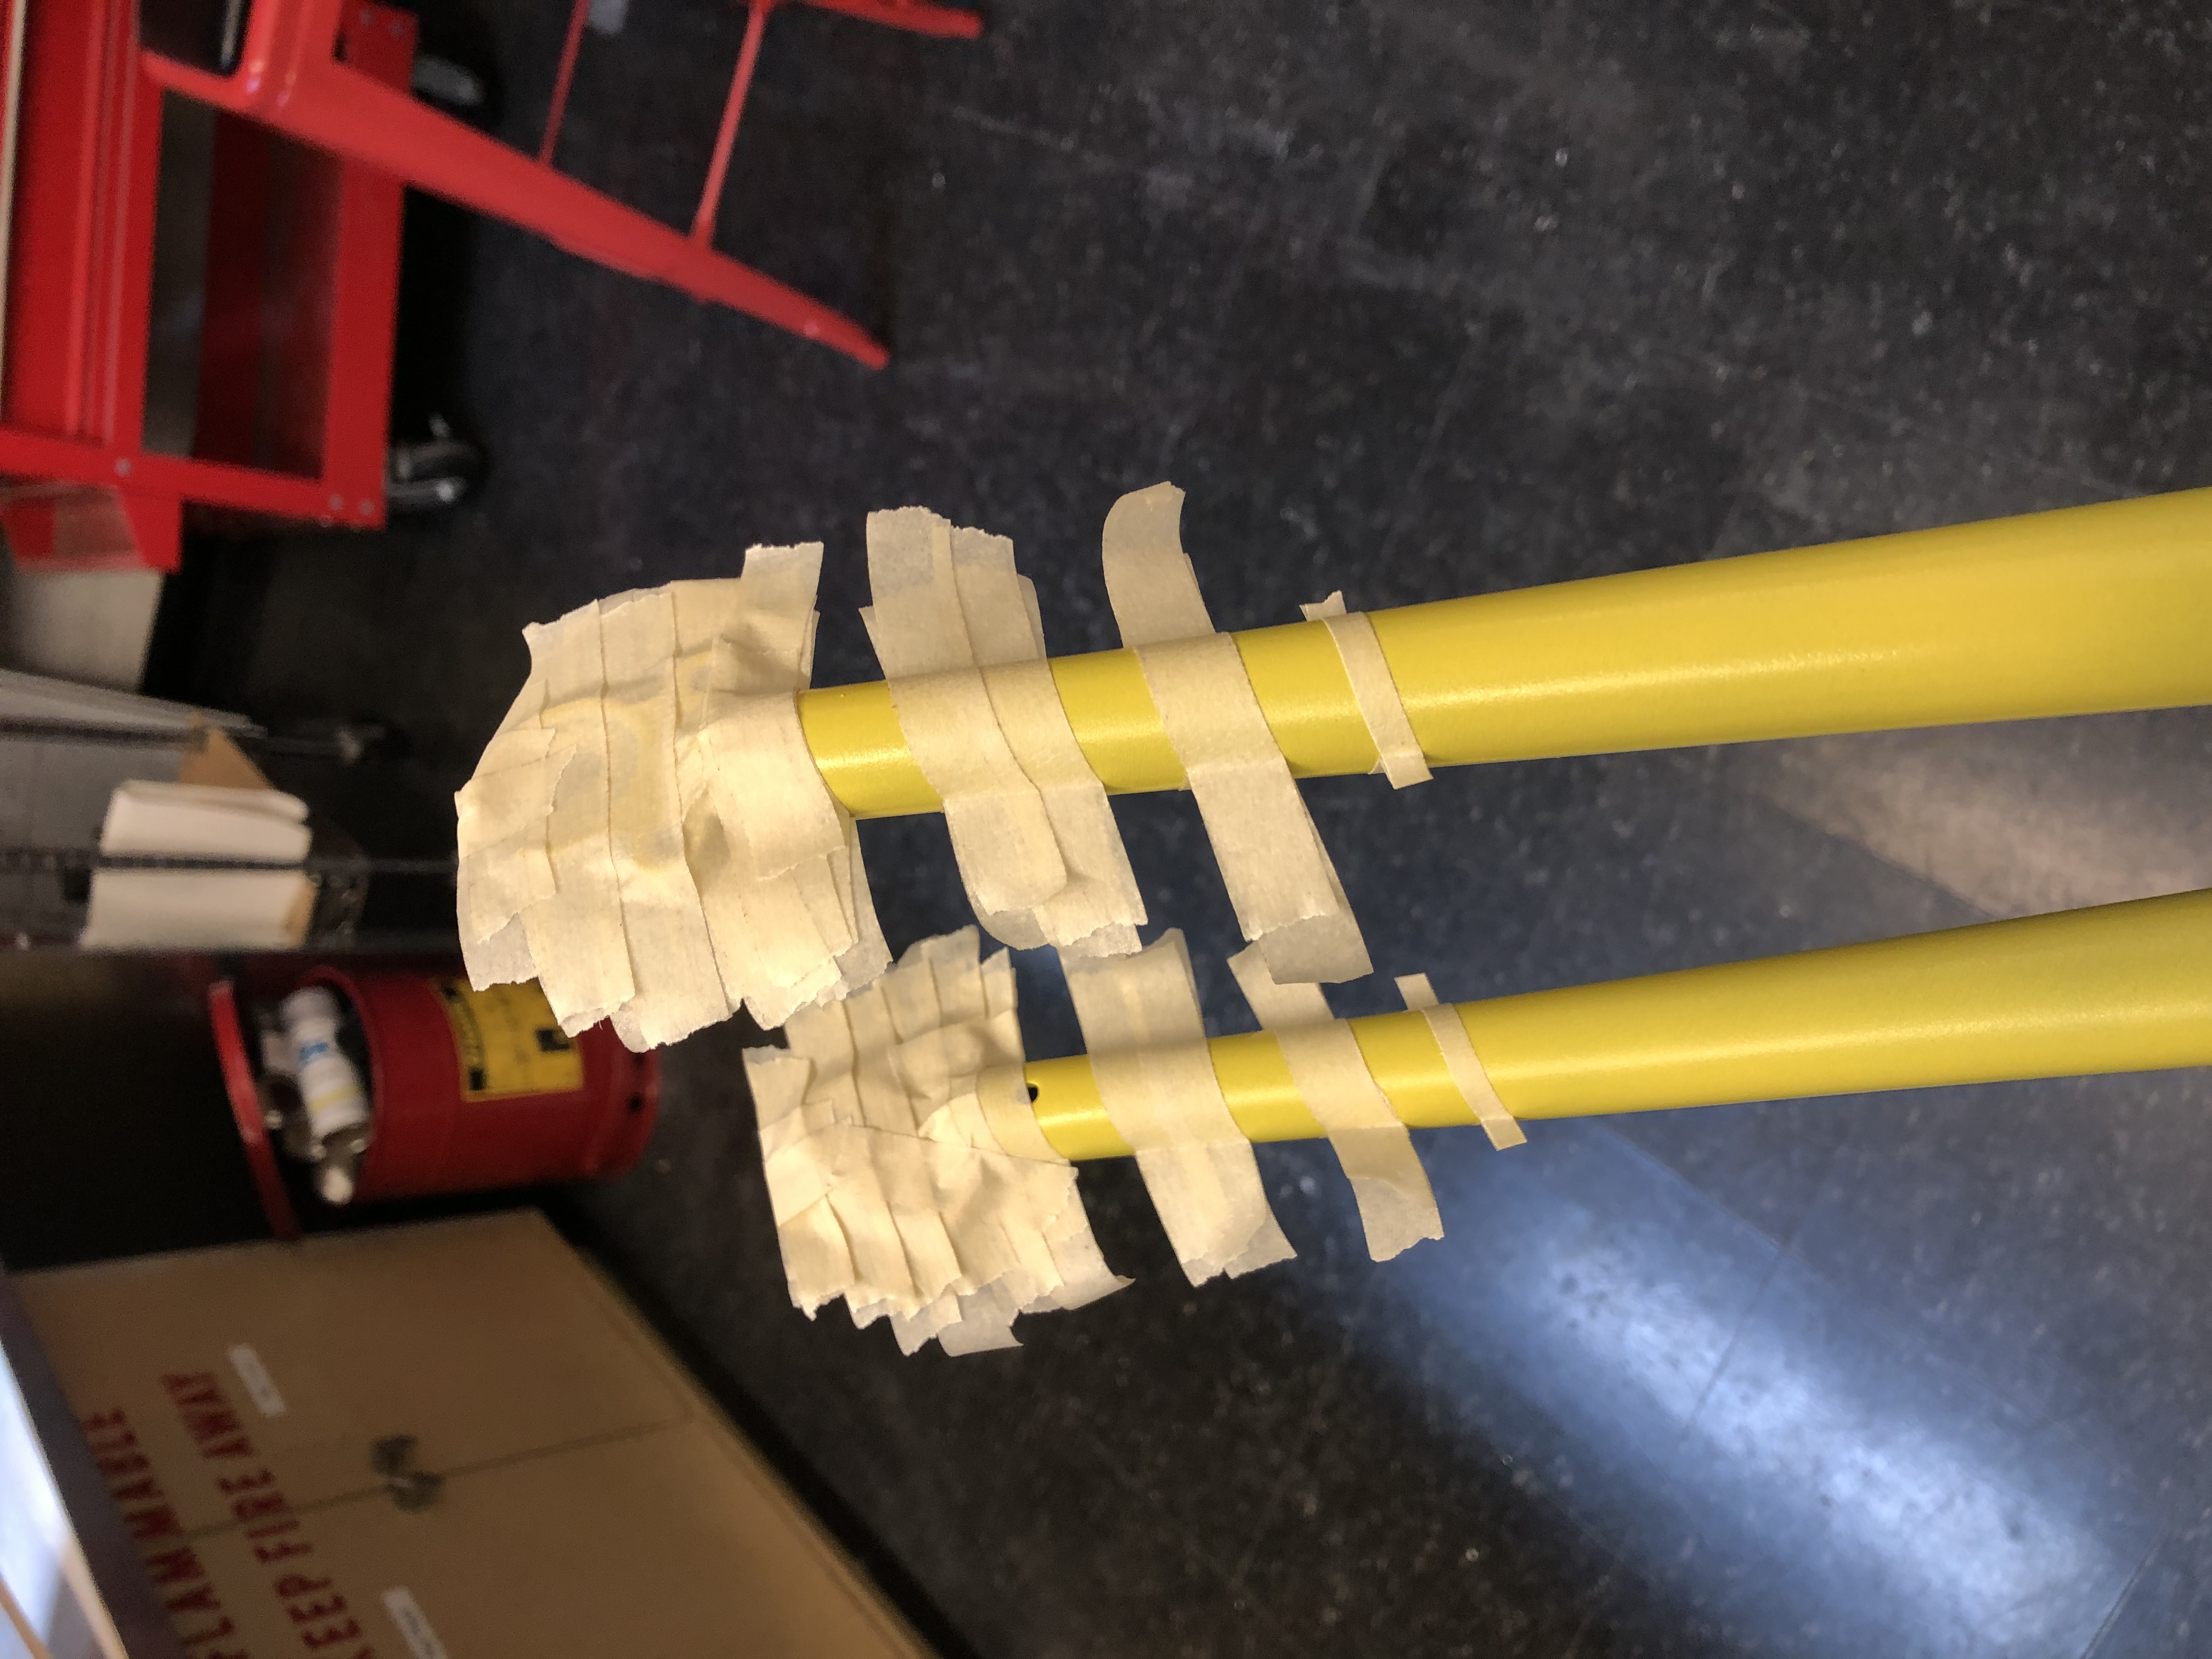
I was going to do the fork first, it seemed easier to manage. I didn’t have any decals planned, just some stripes and it lighter and smaller etc. I started with sandblasting to remove the existing black paint, then I put on a layer of gray primer and a few coats of yellow. I then masked the frame with pieces of masking tape that I had measured and cut to size.
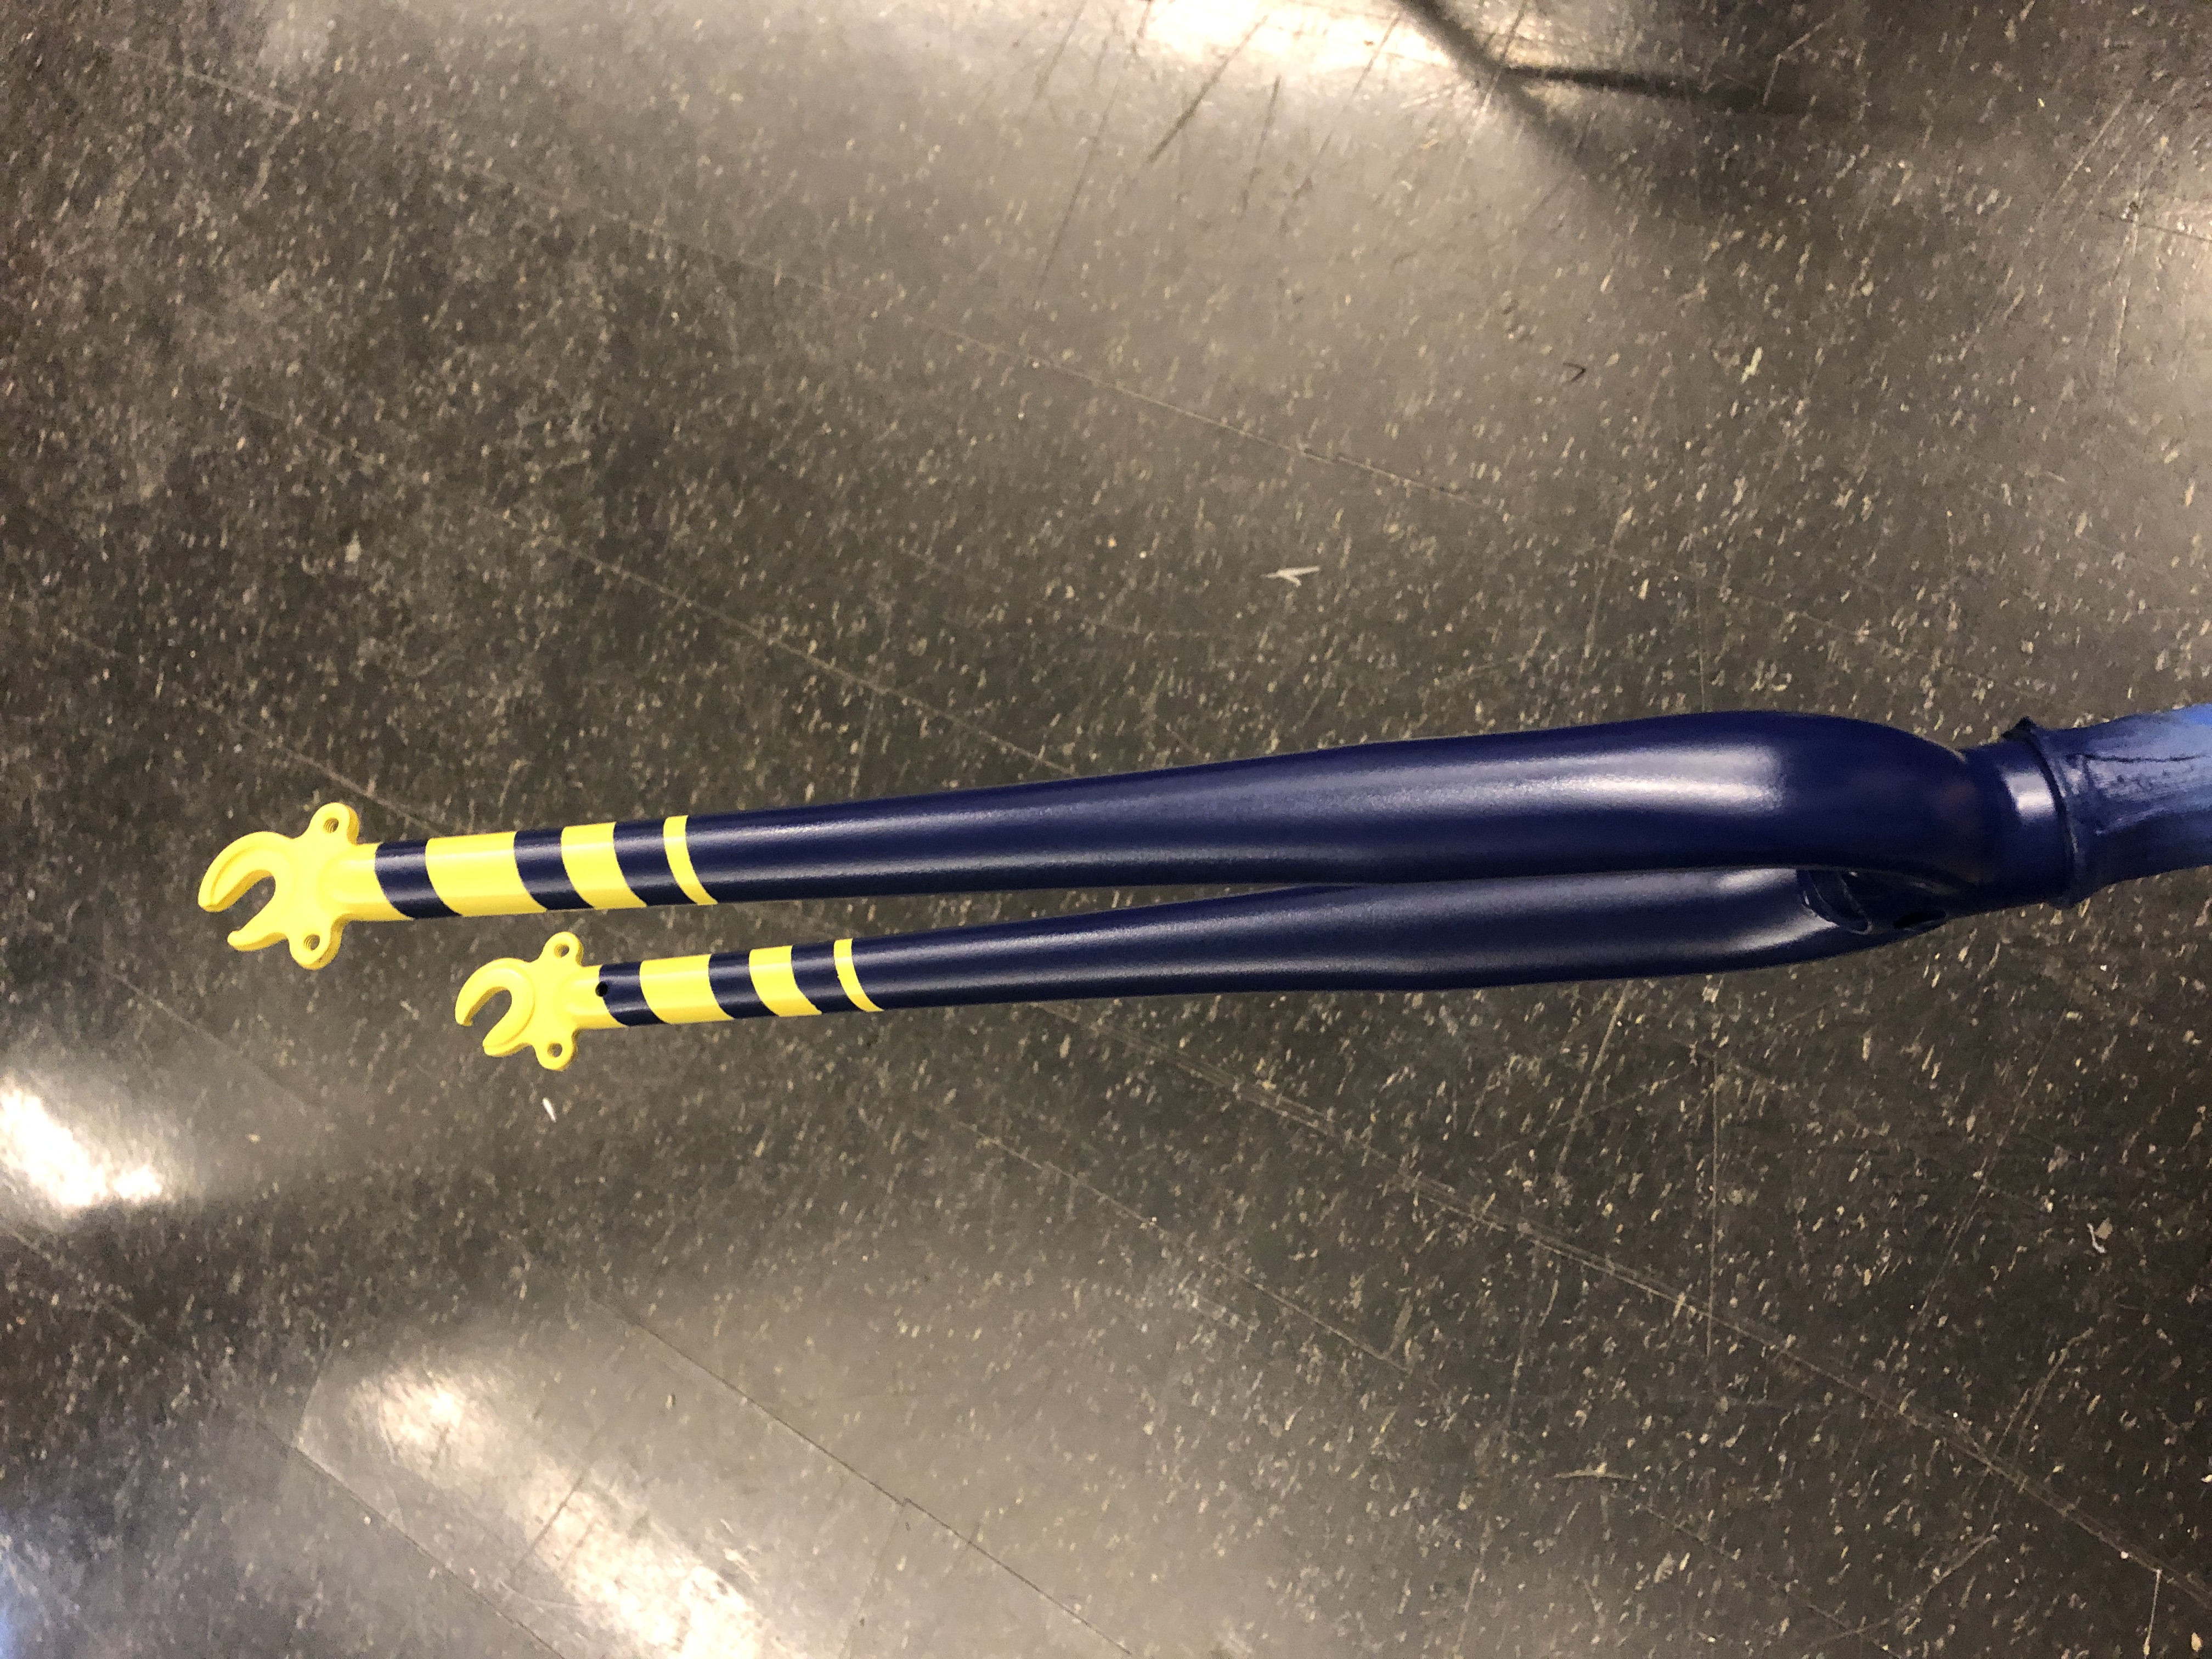
Then I put on a couple of coats of the navy and hoped for minimal bleeding around the masking. It ended up being pretty acceptable.
Next it was onwards to the frame. I printed out the decals in a couple of sizes and taped them to the frame to see what sizes and positions felt natural.
Then, Jack cut the decals on a vinyl cutter and I got to priming. The primer, paint, and clearcoat were rattle cans from Kustom Kanz and I put down a coat of yellow first and then masked the frame using blue tape, paper, and the vinyl cut decals. With the first coat of yellow on, I placed the vinyl decals and masked the rear triangle. I forgot to mirror the text so it’s backwards on at least one side of the bike but that’s ok, it is not particularly ledgible anyway.
Only thing to do next was put on the navy and the clearcoat.
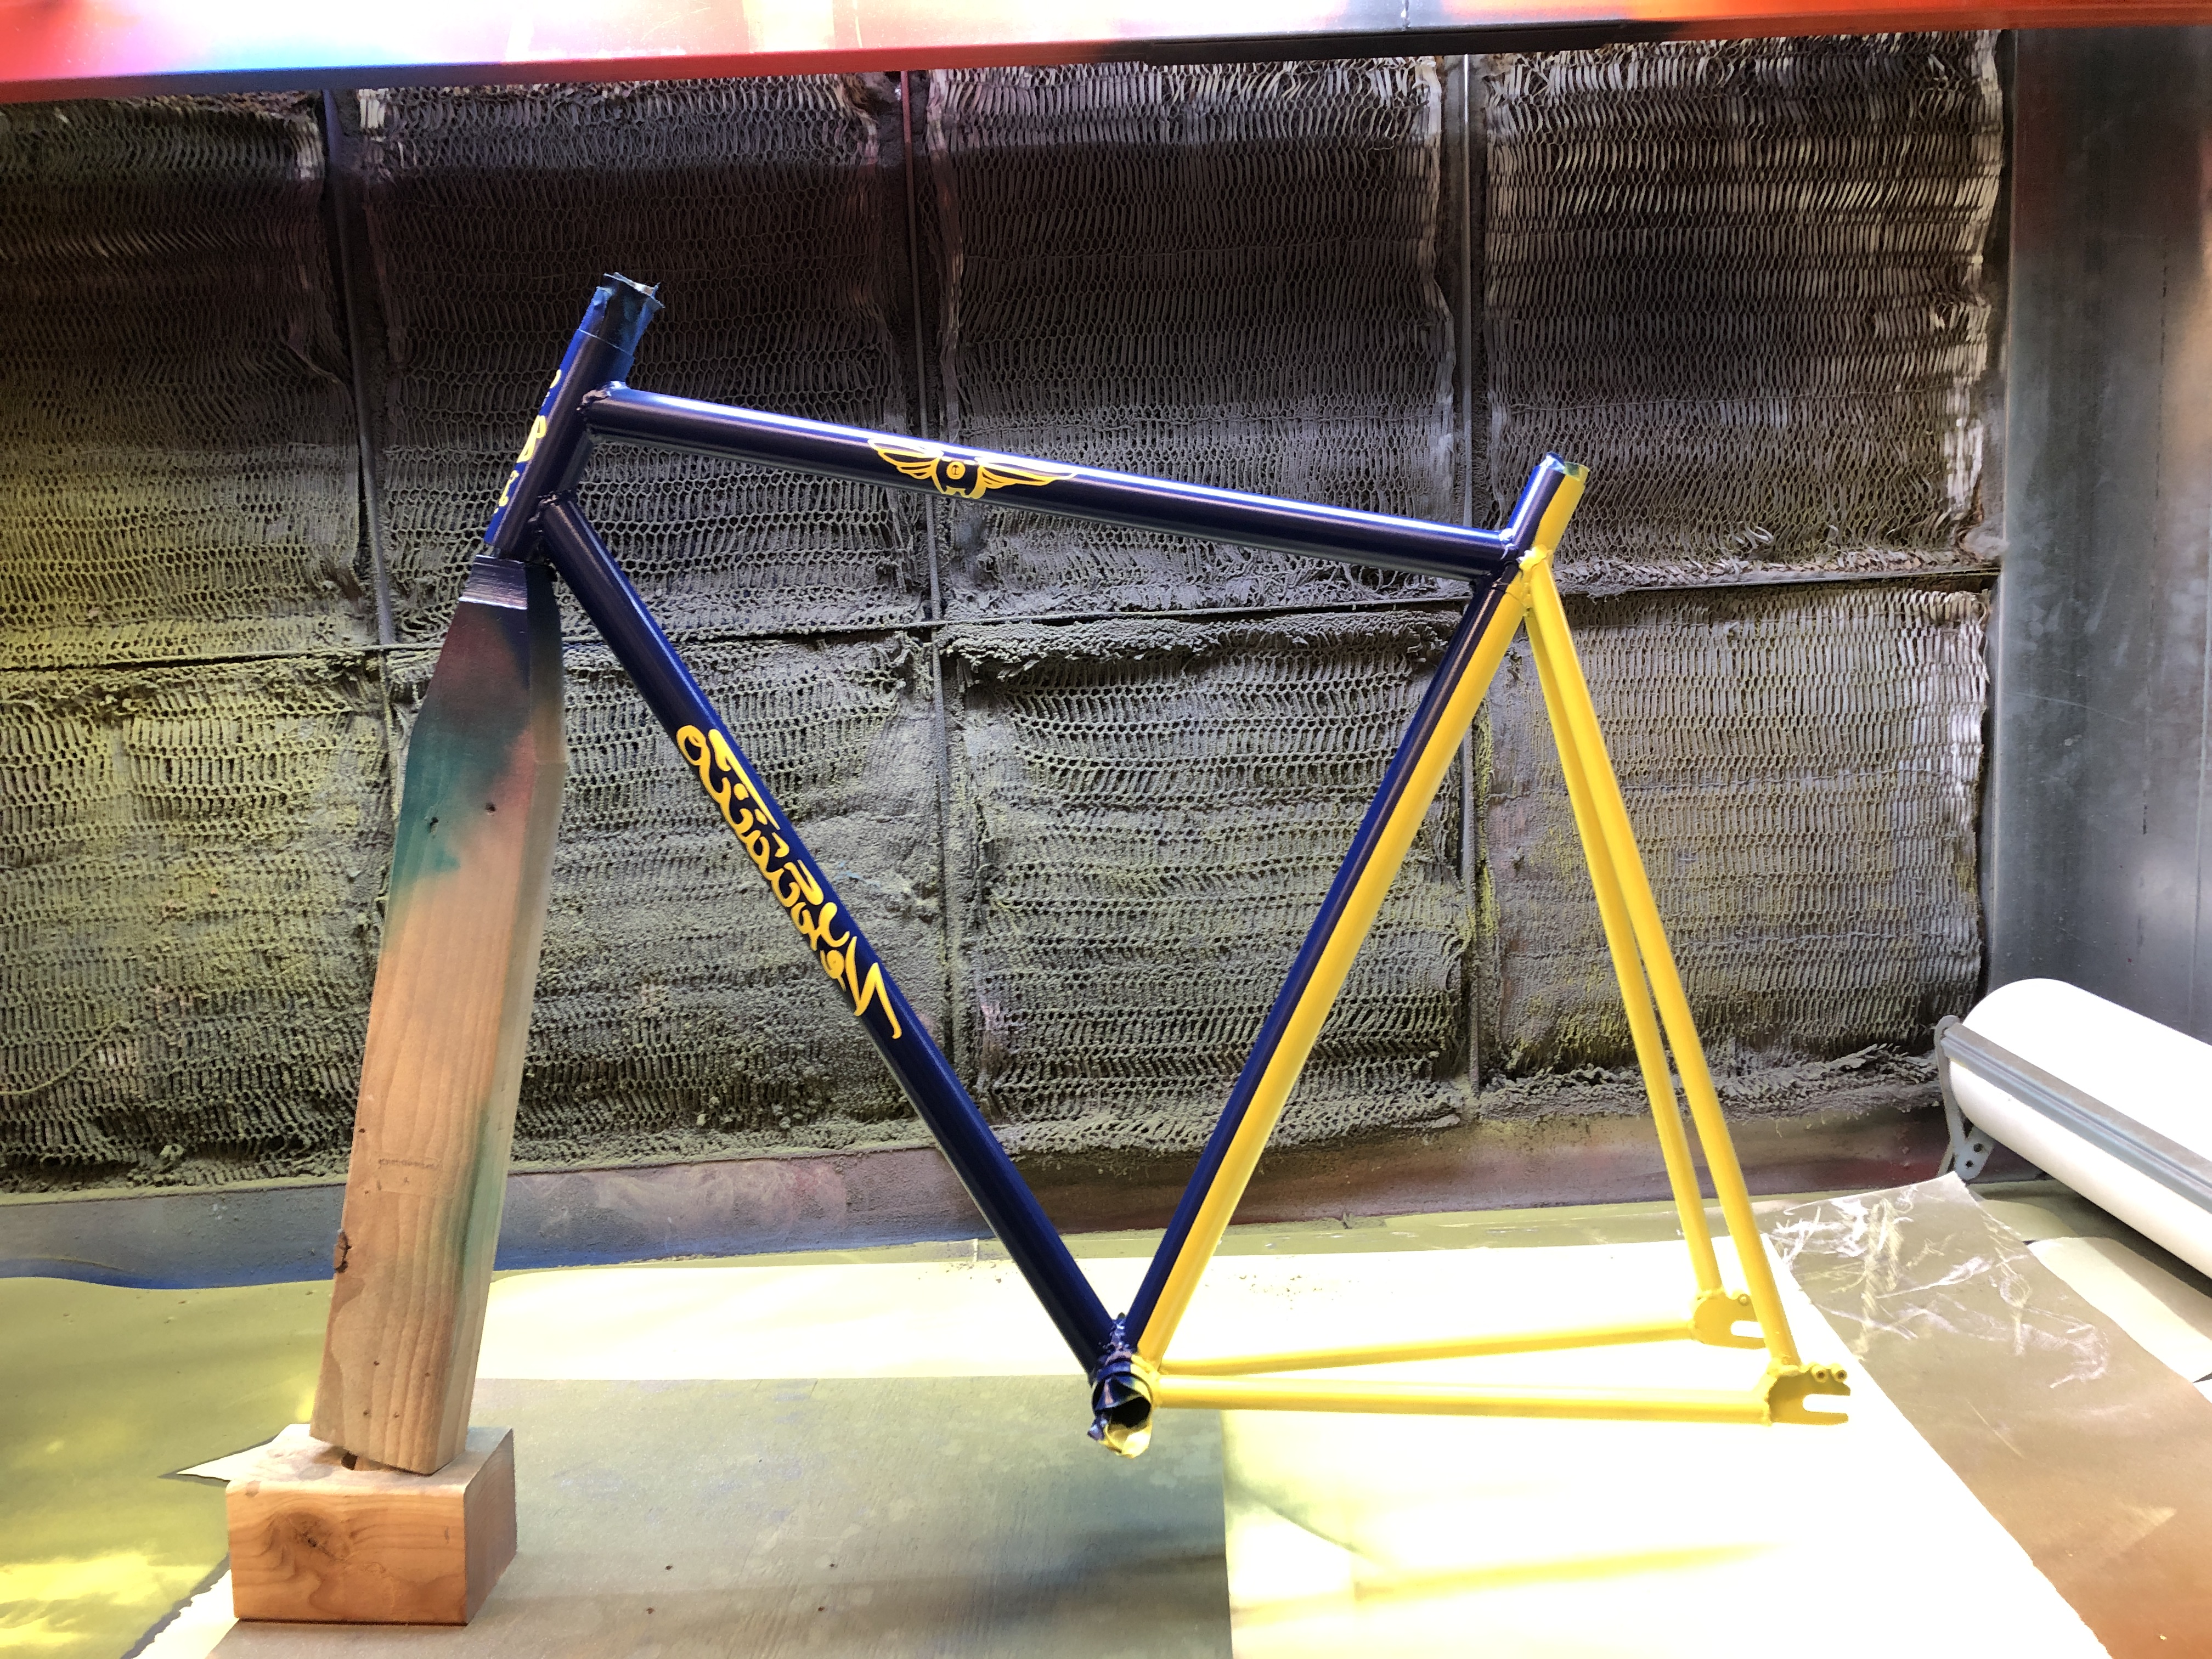
The edges of the decals were pretty clean especially the headtube “badge” decal.
I painted everything in one night, waiting between coats and colors for everything to dry. I attempted to scuff the layers which were going to get covered in the hopes that the paint would adhere better, but I’m not sure if I did it correctly or if it made any difference.
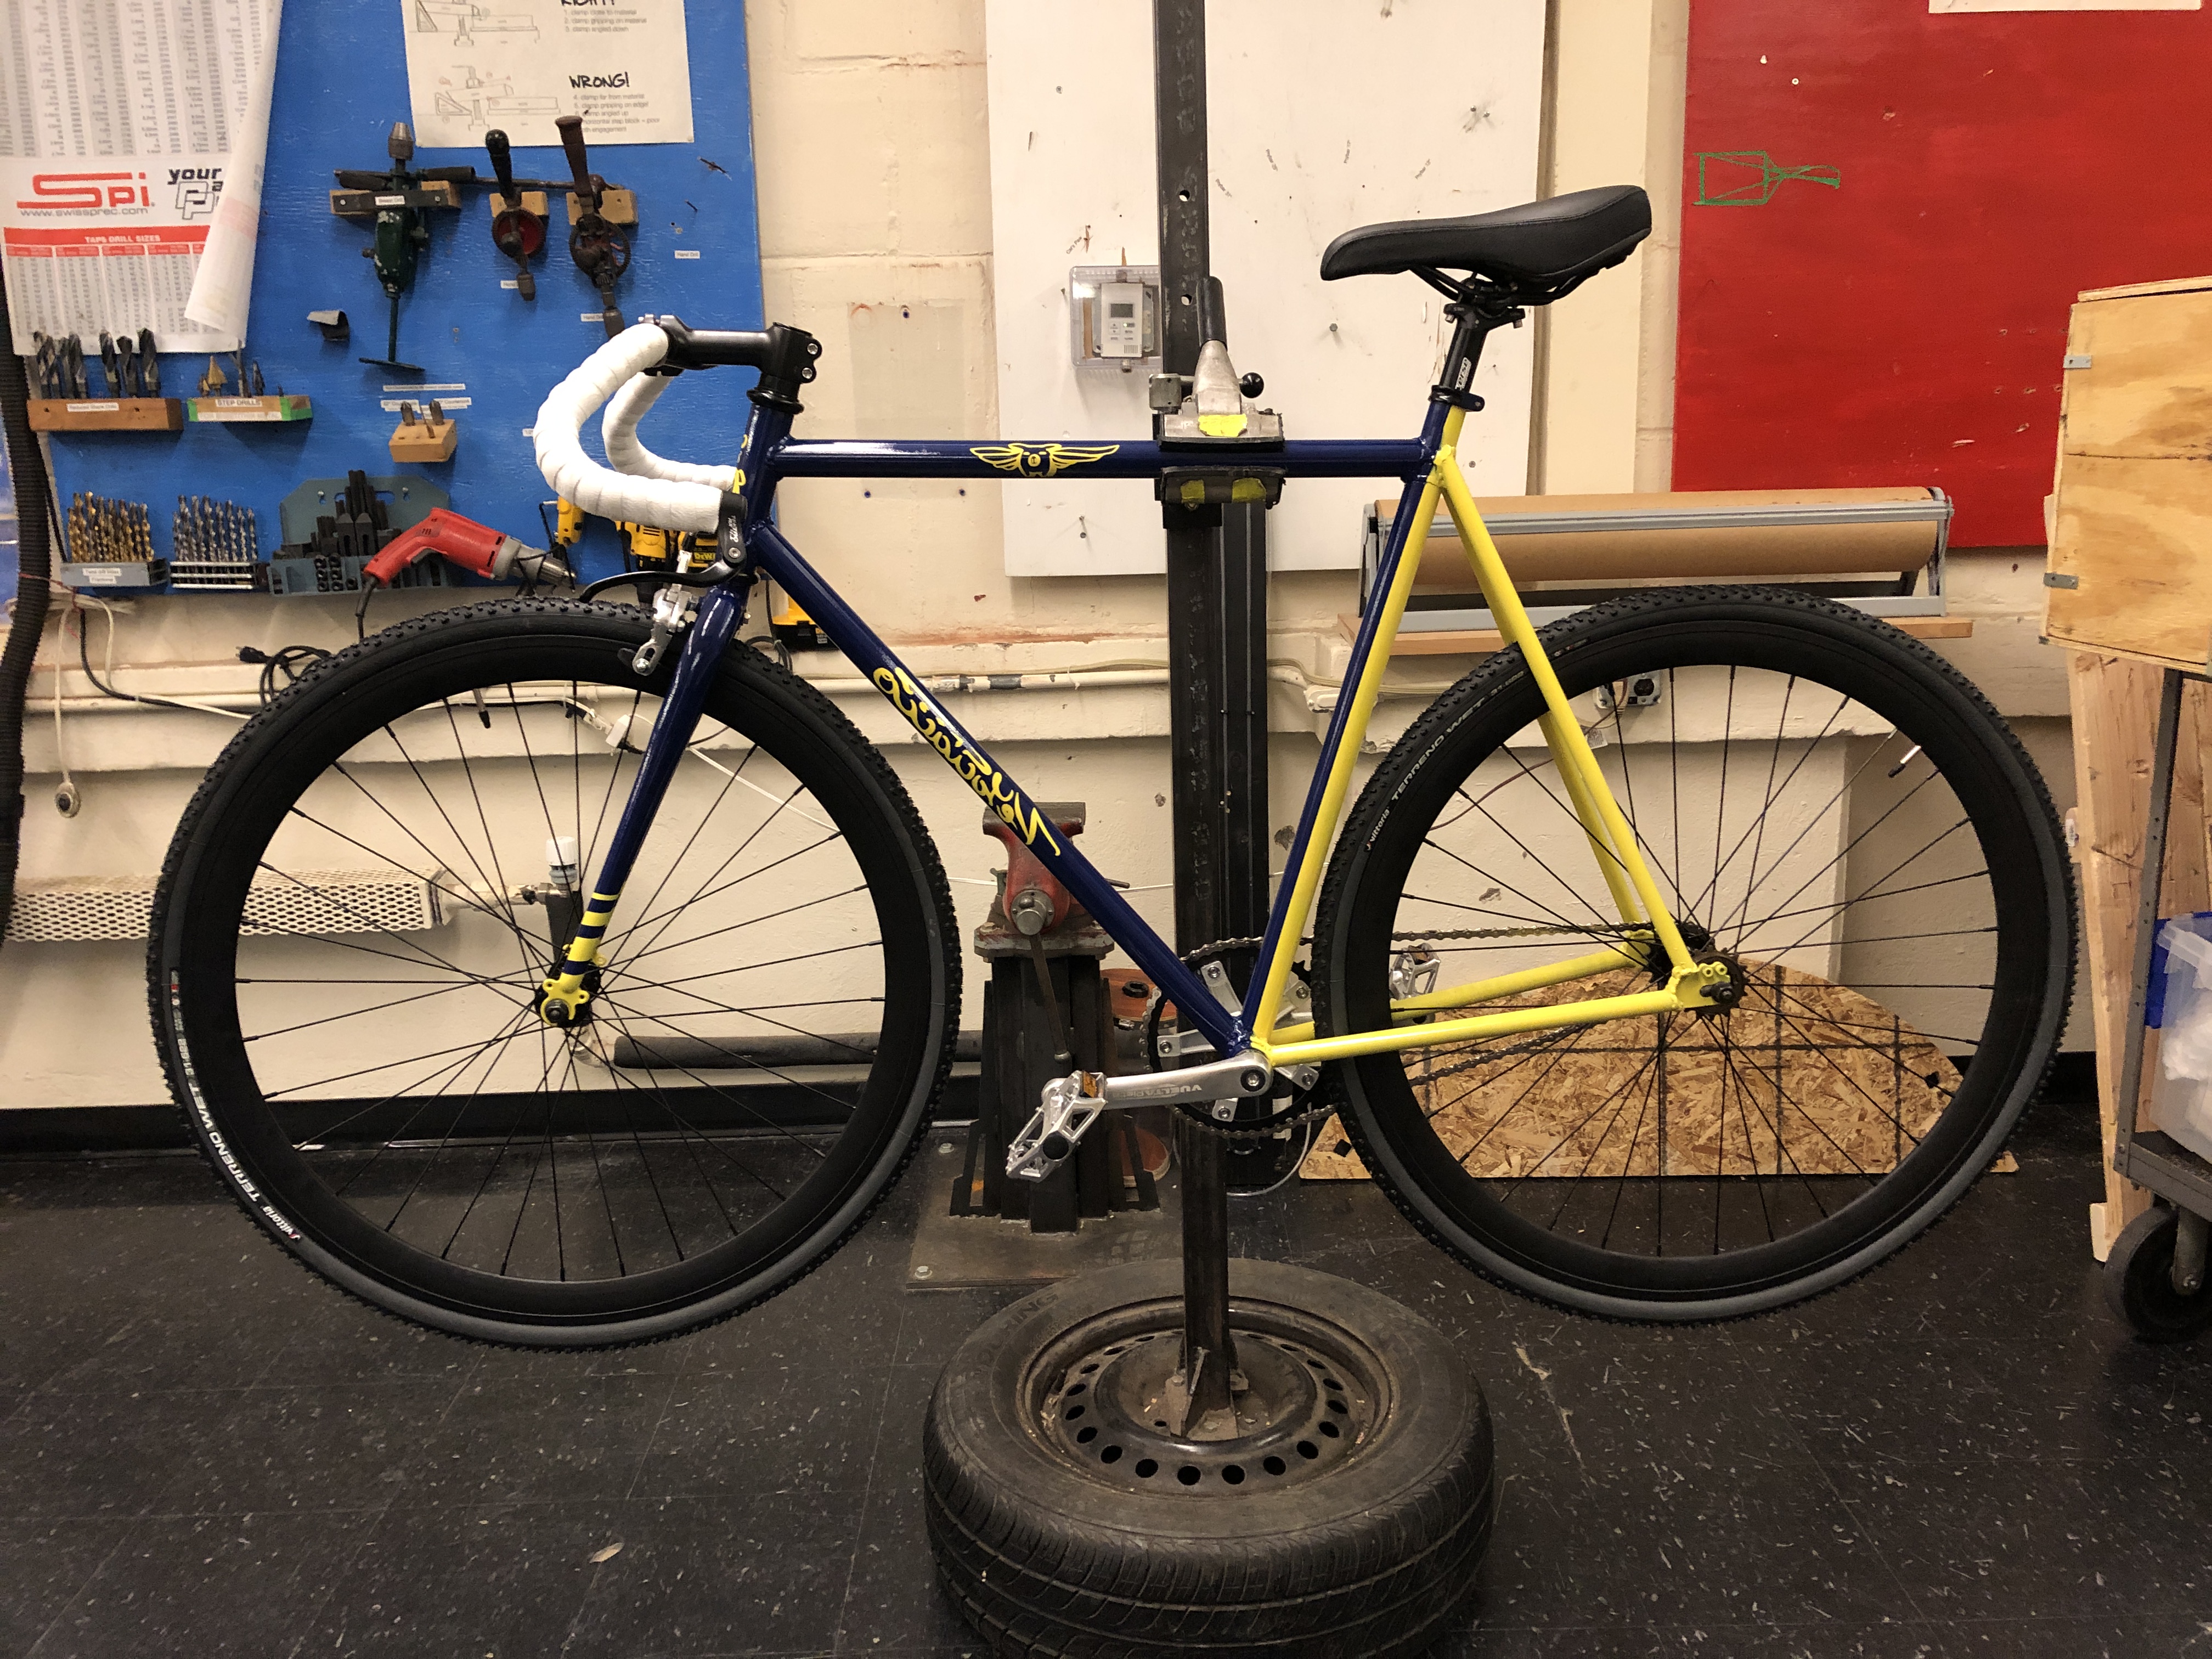
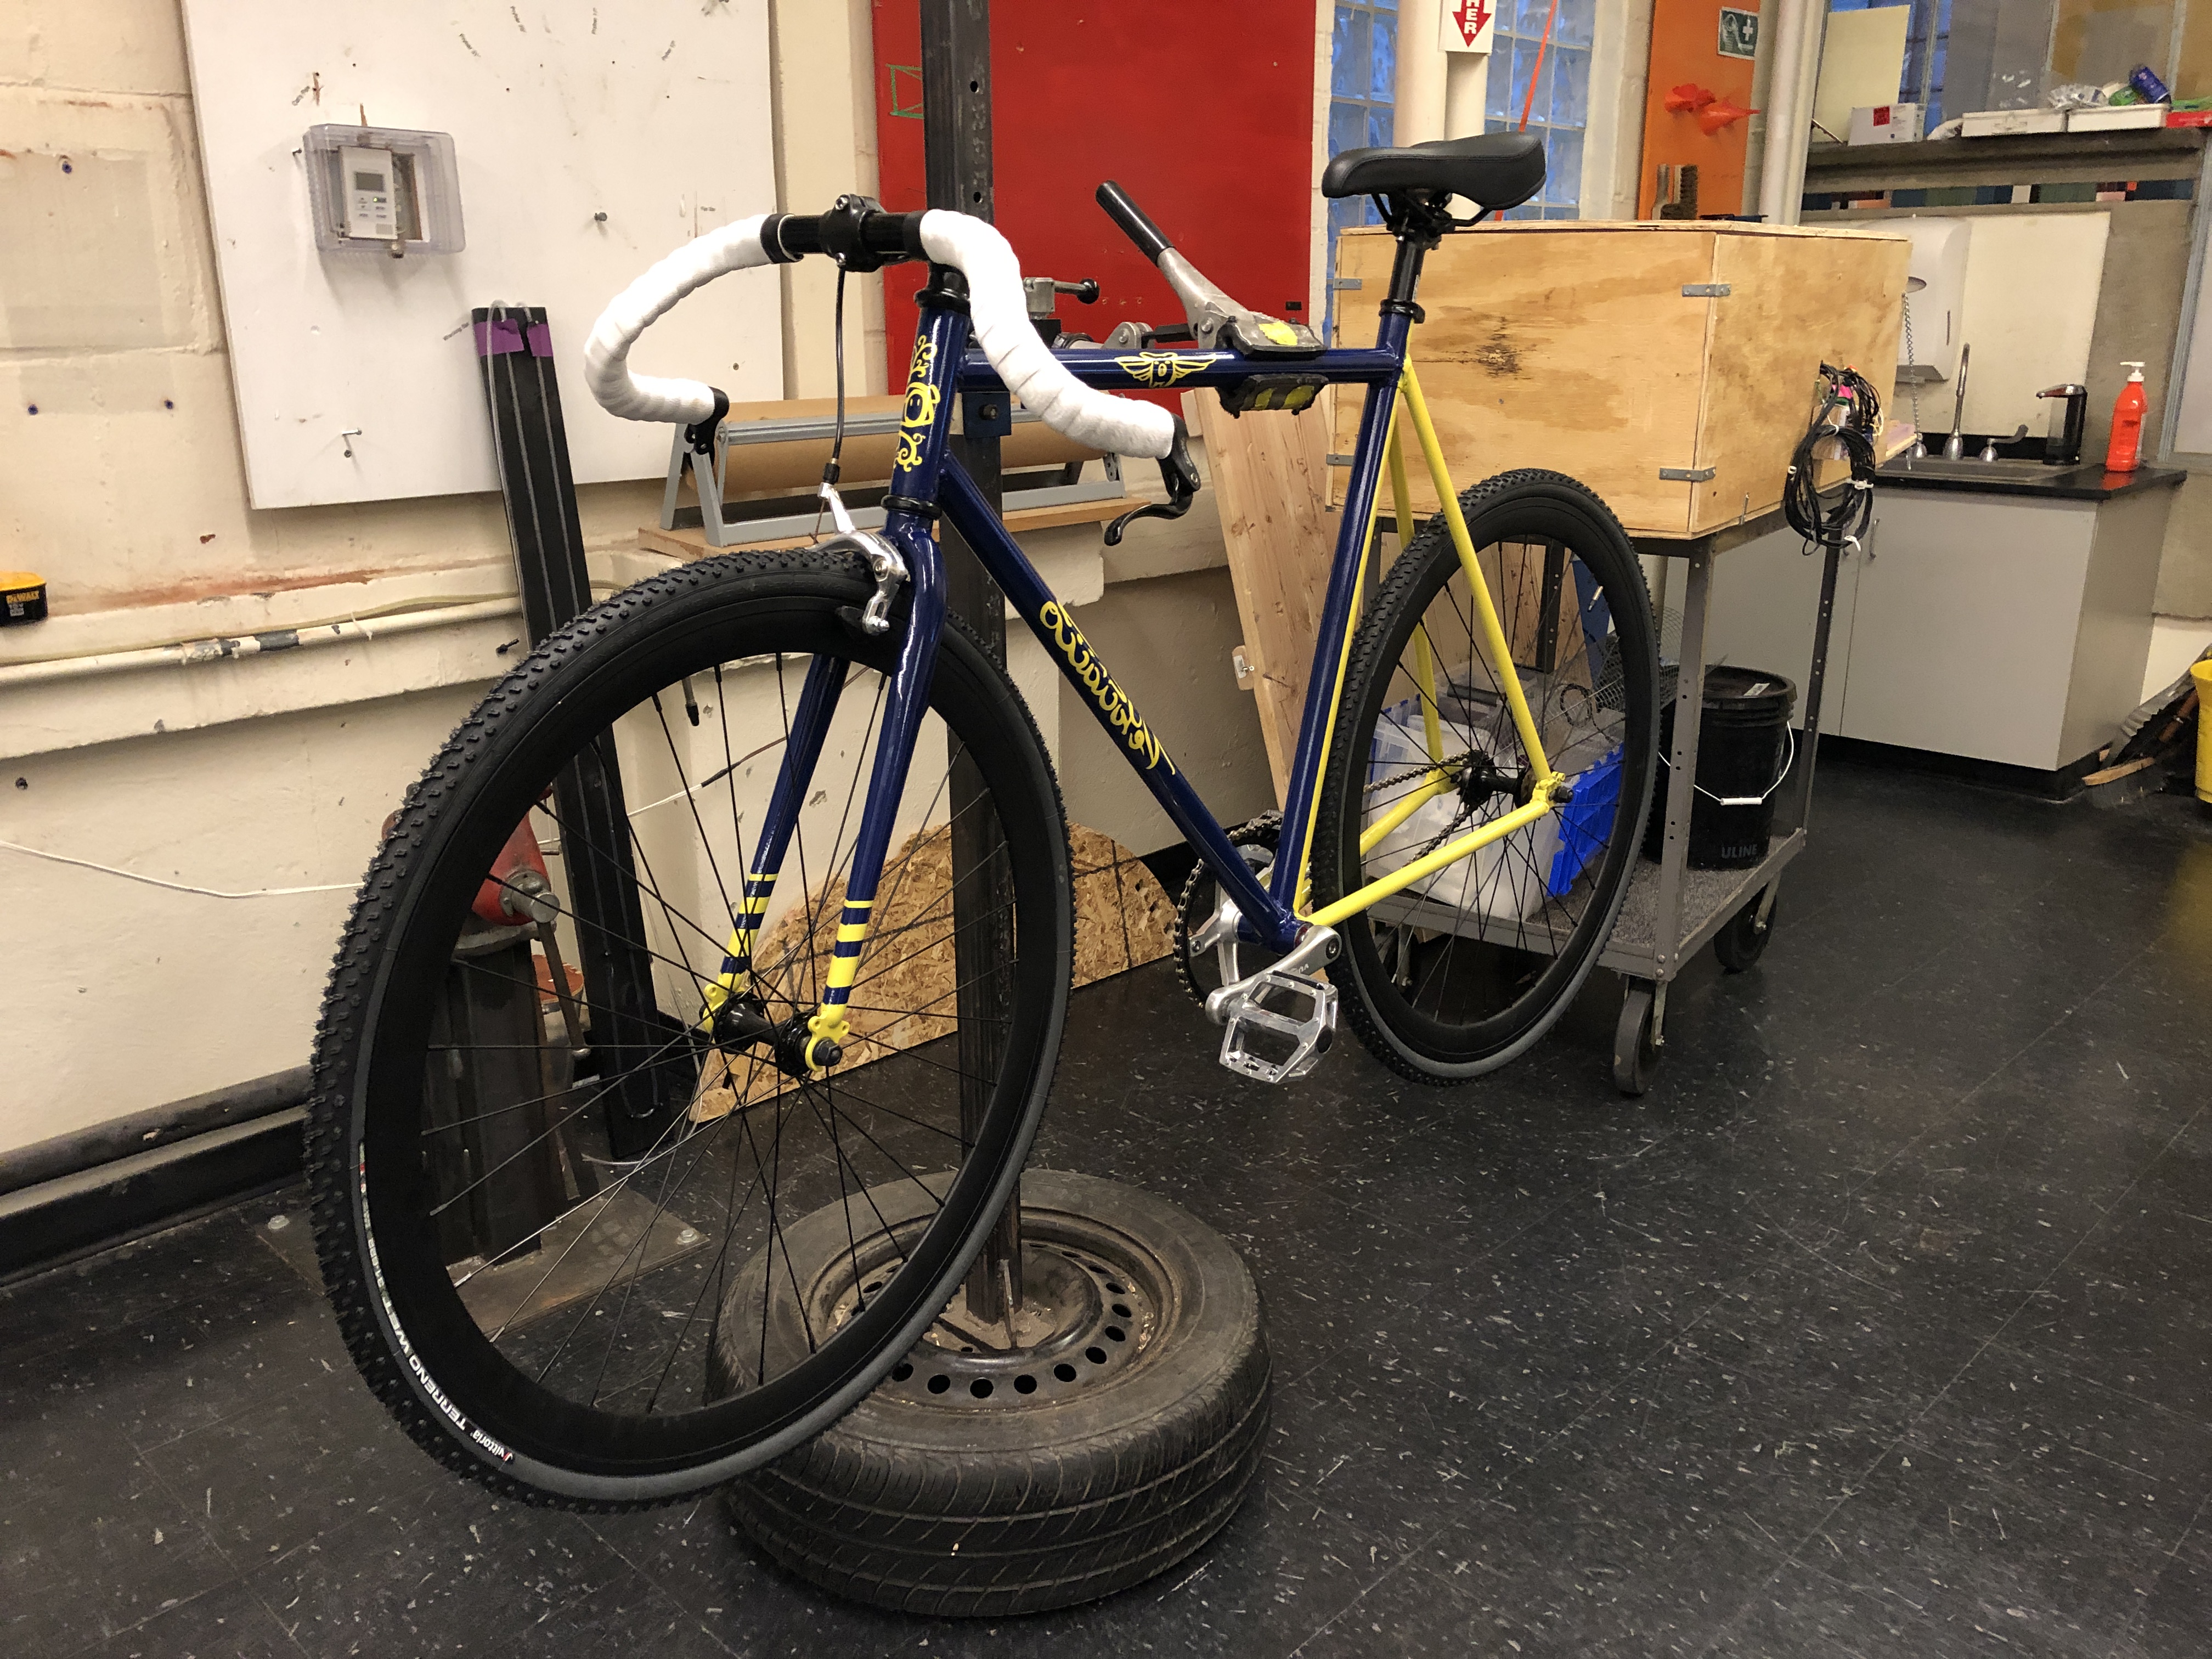
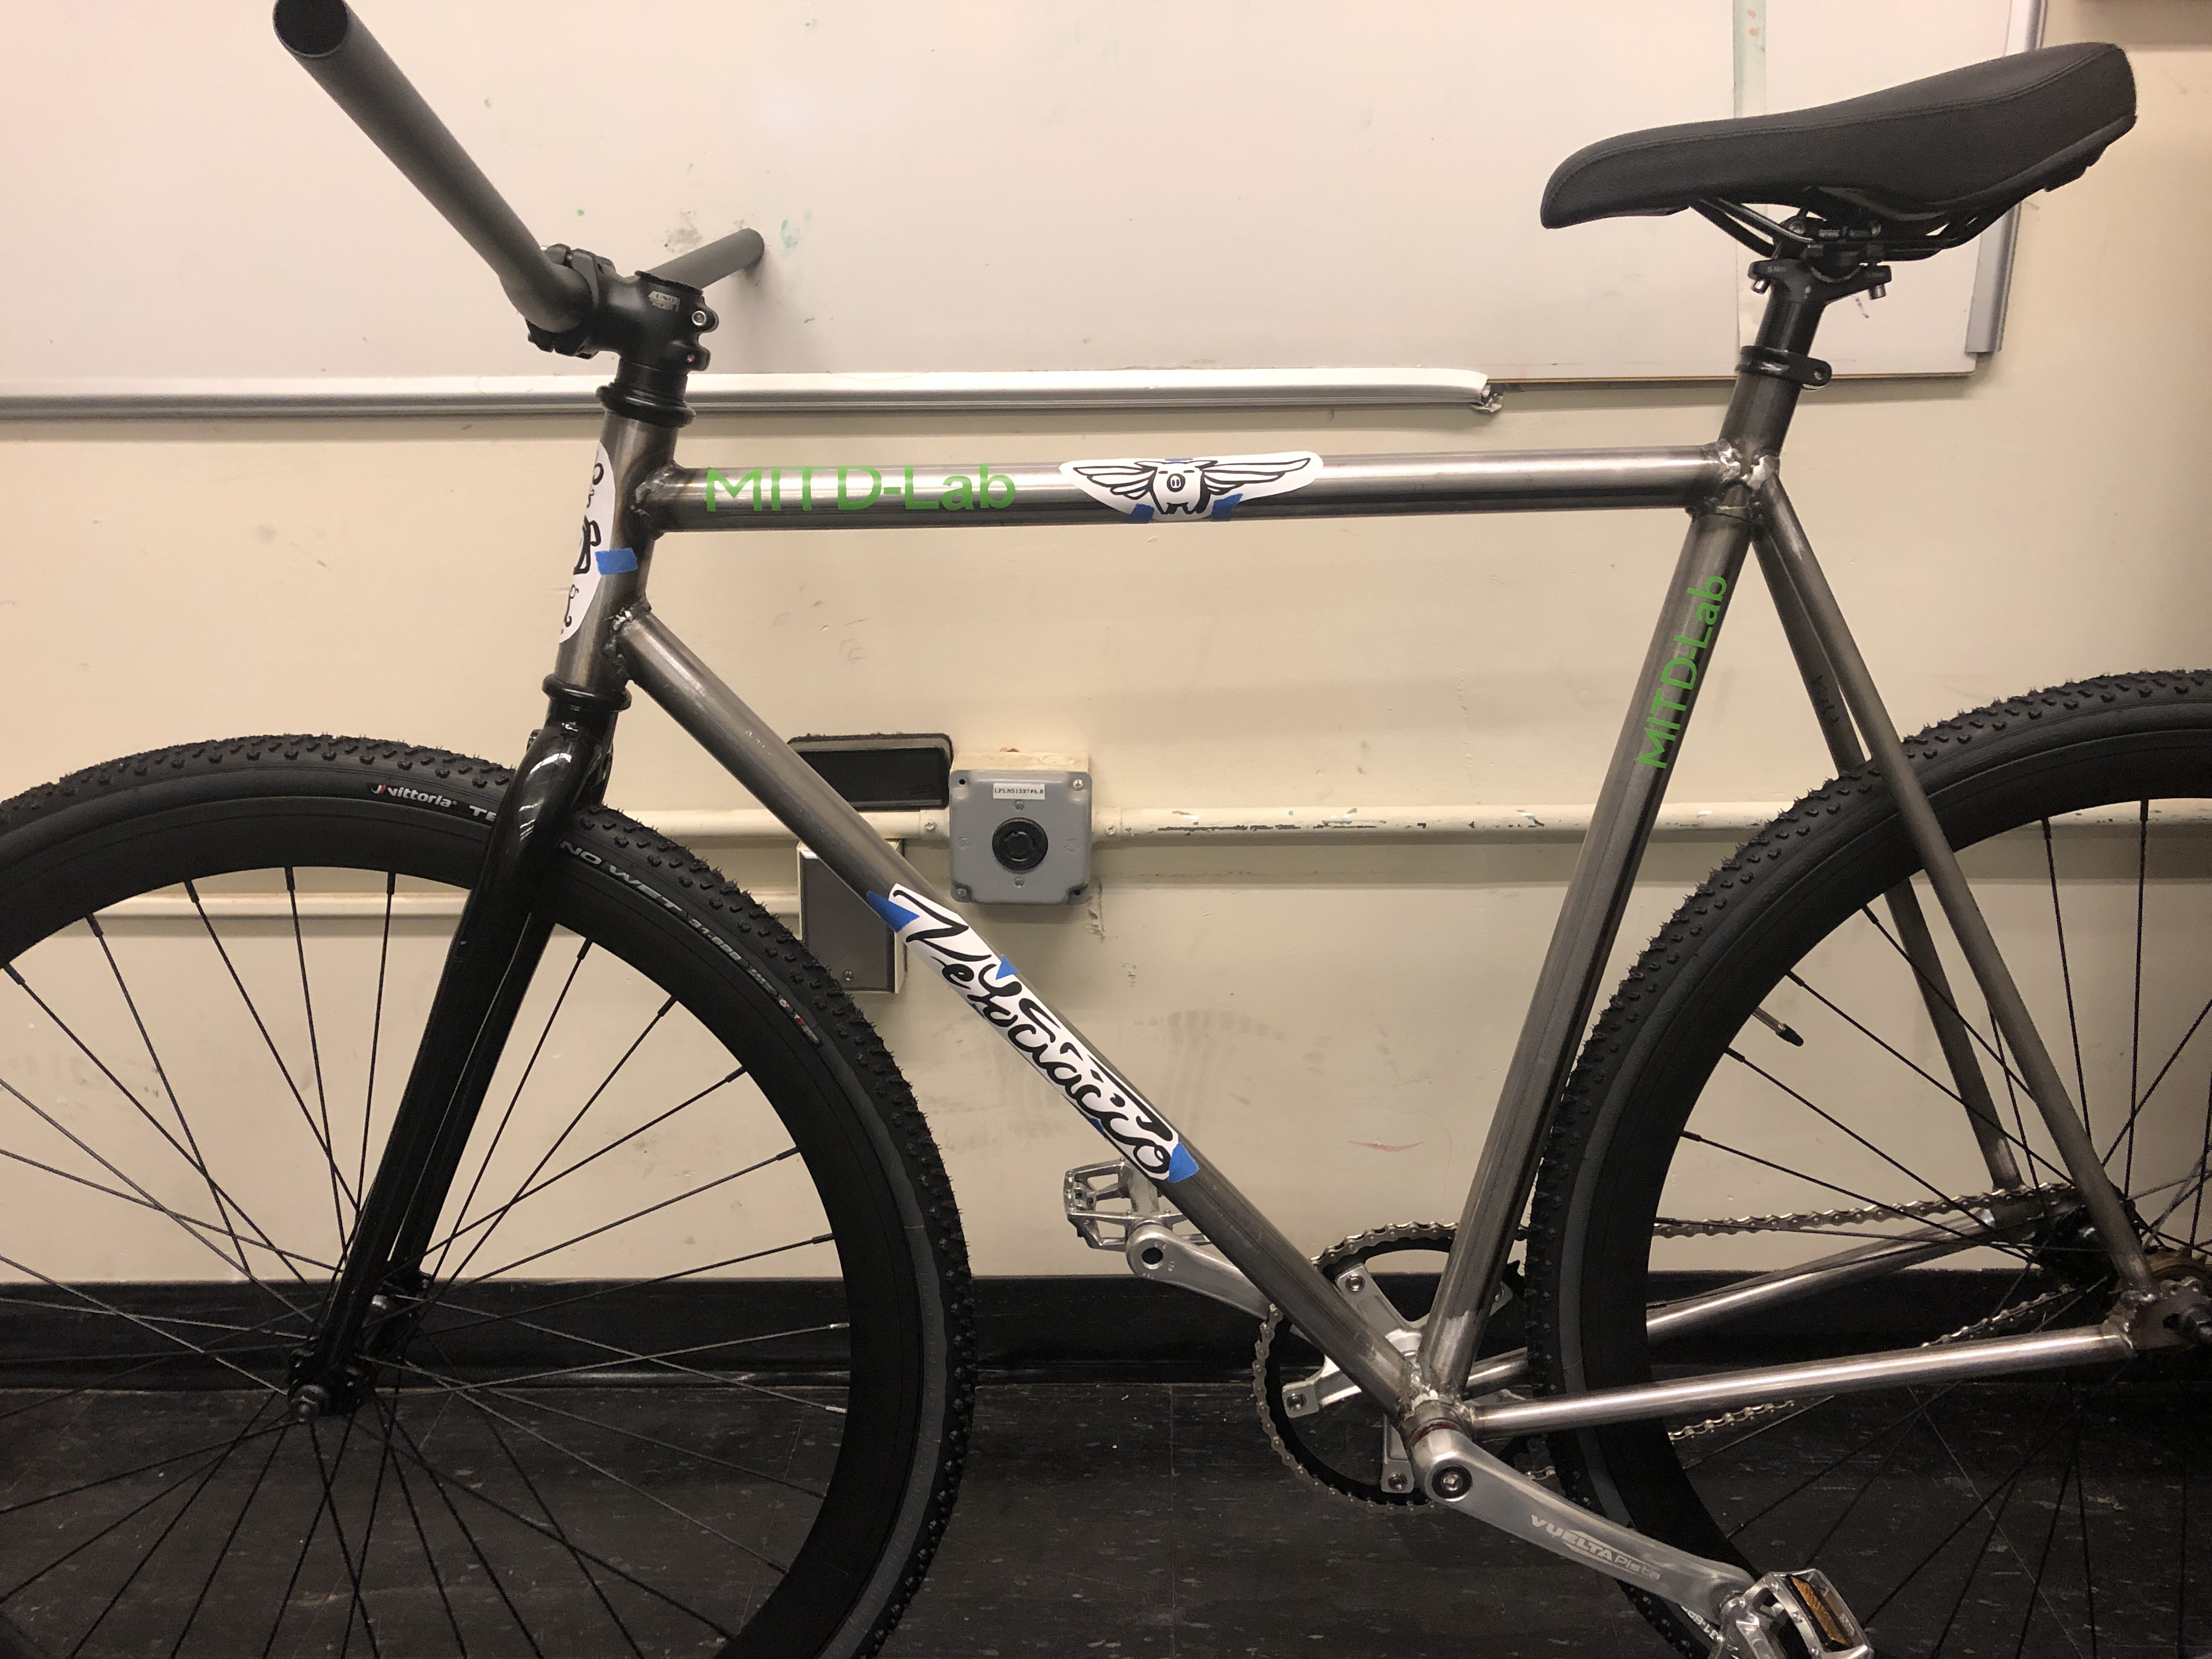
Photos of the final bike
Here are a few pictures of the finished bike.